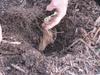
I’ve been tucking in the back (and front) “40s” this past few days (and I have the aching back to prove it)! The weather is going to dip down into the teens Fahrenheit in the next few days, and now is the time to get these final tasks done.
Our small town gives us excellent value for our tax dollar in the areas of street management and yard waste pick up. They are picking up the last loads of brush and leaves today. I left a good size pile of sticks and branches. Our trees are large and mature. They drop a lot of wood into the yard. Most of it I burn in the chimineas, but I didn’t have time for as many fires as I would have liked this year, so my kindling pile is now on the curb along with raspberry canes and lots of willow, which falls continually and is quite a nuisance.
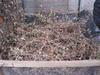
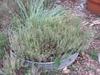
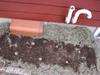
I’ve been covering and uncovering the cold frame daily. Once the temps started falling into the teens, I started banking it with a bale’s worth of straw “slices.” A kind neighbor picked up the bale of straw at the village composting site and gave it to me. People use them for decoration and then discard them. (It would be nice to find a few more—I need to cover my strawberries at some point.)
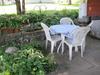
I carried my lawn chairs, benches, and tables up to the patio and covered most of them with a vinyl tablecloth and stowed my one marble top in the birdseed bin. (Marble weathers badly here if it isn’t protected.) I also put away miscellaneous garden ornaments that I had missed earlier, and my husband stowed away the terra cotta in another outdoor storage area. I don’t think I could squeeze one more thing into the wood box!
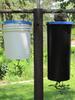
The rain barrels have been disconnected from the house and drained. I’ve left one watering can outside so that I can water the cold frame a few times before I pick that last salad!
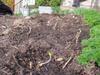
I also worked on tidying the north side of the house and compost bins. I put another layer on the full one and cleared the other side so that I could add layers of chicken manure and kitchen scraps as the winter progresses. I have a few bags of leaves set aside for that purpose as well. I am going cut back the last of the mums that are now done blooming today and add them to the pile as that first rough layer!
We are supposed to get snow tomorrow. I can watch it fall and the birds feed with a clear mind. That is the wonderful thing about living in a temperate zone. You get a rest from active gardening, and time to reflect on the previous growing season and plan for the next. Begonia
My potatoes grew luxuriantly all summer. I added compost and hay at intervals and made sure they were watered. I was expecting a bumper crop of nice big spuds! (See my May 3 and May 29 blogs.)
I ended up with duds! I actually had a NEGATIVE yield! I planted more potatoes in the spring than I harvested in the fall. I showed my pitiful colander of taters to my neighbors, who looked at it thoughtfully and remarked that it reminded them of their 401K—“What happened to the other 75 percent?”
My chicken manure-based compost is potent stuff. Perhaps it was too much of a good thing. The green vines looked great and were at least four feet long in most cases. I wish that energy would have gone into producing potatoes!
I used half of my crop in the beef stew I served for supper tonight. The other half will become potato kale soup. There is nothing like a big pot of soup at the end of a blustery fall day. (I’ll just try not to think about just how much effort went into the two meals!) Begonia
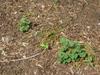
The Ozark Beauties are bearing an autumn crop. The berries are fragrant and have a wonderful sweet, true strawberry taste. It is odd to be eating a fruit just a few days before the frost date that smells and tastes like June. It feels like the year is running backward!
My experiment with everbearing strawberries won’t be complete until next May or June. I’ll cover these plants later in the fall and uncover and fertilize them early next spring. There are three varieties in three beds on this slope of my front yard. I planted them mainly to hold the slope. Of course, the variety that I planted on the steepest part of the grade is the one that spread the least! I will have to transplant plants from the more luxuriant beds into the thin spots—that is, whatever variety makes it through the winter!
That is the wonderful part of gardening. There are plenty of opportunities to try new varieties and enjoy new experiences like eating homegrown strawberries in September. Begonia
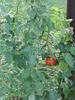
I was afraid I wouldn’t get any ripe fruit from my hanging tomatoes before frost. My worry was groundless. I picked the first fruit, and we ate it on a salad recently. I still don’t know what variety it is, but it must be an early one!
The plants are doing well through this hot, dry weather. The chicks are stressed by the heat and humidity, but the tomatoes love it as long as they are watered. I have been watering the tomatoes daily; otherwise, there would be problems with the fruit ripening correctly and blossom end rot. (I did have a little blossom end rot on one of the hanging tomatoes because I let it get too dry when the fruit was forming.)
The upside-down tomatoes turned out to be a successful experiment. I think I will grow some again next year. Begonia
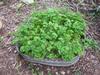
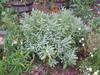
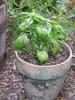
My grandmother always had chives growing outside her kitchen door. She would often step outside while preparing a meal, cut some chives, and step back into the kitchen. When I was a small child, my grandmother was already a widow living alone with a temperamental old cat named Deedeepuss (You had to be careful to pet only her head or she would nip you!) By this time, she had downsized her garden to one bed by her back stoop under the windows of her screened porch. There was an old water pump that gave rusty tasting water in it as well. (All us kids must have stood on the back step and pumped that screechy stiff handle until the water dribbled out.) The chives were located at the base of this pump, so she never had to even leave the steps and could be back in the house before anything could burn.
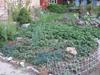
I think that everyone’s life would be richer if they had some chives growing within easy reach. I grow most of my herbs and vegetables in my front yard because that is where the sun shines the most. I guess lots of people are doing this sort of thing now—it’s hip. I’ve done it for years out of necessity. I just have to have fresh tomatoes and herbs in the summer.
I started with a semicircle of whiskey half barrels and then expanded into a wider arc of zinc tubs. A flower and herb buffer with a 12-inch wire fence next to the sidewalk followed after I noticed dog walkers allowing their beasts to come 4 or 5 feet into my yard to “water” my kale! The rest of the lawn was gradually converted into beds via sheet composting. (They call it lasagna gardening now!)
I have parsley, basil, chives, oregano, sage, dill, rosemary, bay, borage, and thyme growing in pots and beds in the “front 40” (feet). When I cook, it is all there for picking as needed. Since the vegetable gardens have started to produce, I find myself in the front yard a lot!
As you can see, it doesn’t take much space to grow as many herbs as you or your family needs. One or two sage plants can supply enough for Thanksgiving and the rest of the year. I grow my bay and rosemary in pots and bring them in every autumn. We have free fresh herbs all winter. Herbs are some of the hardiest plants you can grow—they’re basically weeds! (Ask anyone who has had chives seed into their rose bushes!)
If you have a small sunny spot on your balcony, patio, or front yard, try growing some herbs. Begonia
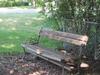
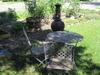
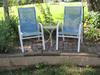
I have six areas to sit in on My Little Farm in Town. When my daughter was too young to play outside alone, I spent a lot of time standing around (when I wasn’t gardening on my hands and knees). I soon became tired of standing or sitting in damp or prickly grass. Gradually, I began to add benches and chairs to the various parts of the yard in which we spent most of our time.
As the years and garage sale seasons passed, I added small tables to these areas and then wood chips and patio brick (with the help of my husband). As my daughter got older, I added outdoor fireplaces (chimineas) to at least half of these areas. A couple seating areas have lovely views of farmland (we live near the edge of town), others face flower borders or my rocky shade garden, and I have potted flower gardens that border others.
Almost all of the chairs and tables came from the curbside or garage sales. I found enough patio bricks for two areas for 15 cents a block. It took me two or three trips to get them all home in the back of my trusty old Toyota Tercel (I loved that car), and about 10 years before we figured out what we were going to do with them! (I always know what things will come in handy—I just don’t always know when! It drives my poor husband insane.) The wood chips mostly came free from the town composting site or a passing tree service truck! I put cardboard that I collected from the local appliance dealer or scavenged from other sources right down on the sod and covered it with four to six inches of wood chips—instant seating area!
It doesn’t take much time or money to create a seating area for relaxing and enjoying Your Little Farm in Town! Begonia
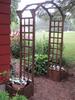
A friend of mine called a few weeks back and offered me a wooden arbor that she needed to get rid of because her husband didn’t like it. (She will be replacing it with a new metal one.) The arch of the arbor needed to be re-glued and a few spots needed some reinforcement; otherwise, it was in good condition. I’d been thinking about getting an arbor for the south side entrance to the back 40. It was definitely on the “Some Day and We Will Probably Have to Cobble It “ list.
Since bare wood doesn’t last long outside, I painted the arbor with some mistint ($5 from Home Depot) deck finish I’ve used on several other outdoor projects. It is probably going to take another five or ten years to use up this gallon. At least everything in the yard will be a consistent color! This type of a painting project is pretty picky because the lattice has so many nooks and crannies, but eventually I finished. It was a perfect day to paint. I had to two painting projects going at once. I also painted the doors and pulls of the bathroom cabinets of our ongoing bathroom remodel.
A tip for any painting project: Don’t throw away that disposable brush until the project is “finished”. You usually find that you have missed a few spots. In my case, I missed an entire side! I was glad I had that brush in a zip top plastic bag.
My husband installed the arbor and we think it looks pretty nice. The planting boxes really aren’t designed to have dirt put directly into them (they would rot quickly even though I painted them inside and out) so I set pots of impatiens in them. I’m glad my friend thought of me rather than throwing it away. Begonia
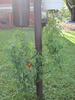
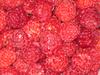
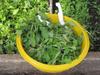
One of the luxuries of living the way we do on our Little Farm in Town are raspberries. Most summer mornings find my husband in the berry patch picking a bowlful berries for our morning cereal. He can’t explain to me why it makes him so happy. He just says it feels luxurious.
When we bought our little Ponderosa on a lot and a half, it came with a neglected raspberry patch in the northeast corner of the backyard. I created some mighty brush piles trimming the trees in that corner of the yard and cleaning up the berry patch. I don’t know what varieties they are, only that the canes are thornless and bear fruit in the summer and again in the autumn until frost.
Each winter I throw chicken house hay bedding and the spent straw from the yard onto the berry patch. Each spring I remove dead canes and cut the tips back to new buds. Every summer and fallwe pick gallons of berries.
The retired farmer and his wife who built the house and landscaped the yard are gone from this earth. They left behind a nicely established berry patch. Not a bad legacy. Begonia
My parents and many of my friends are trying those upside-downtomato thingys made of Mylar and wire. There is hole in the bottom that you stick the tomato through so its top hangs downward and then you fill it with a soil-less mix and water it. The top has an opening so that you can water it without removing the cap. You hang it from something sturdy and watch it grow.
I wanted to try my hand at growing tomatoes upsidedown but didn’t like the price tag. I knew that some people have been using this method since the 1970s with five-gallon buckets, so I thought I’d try making my own out of what I had around the place.
No shortage of five-gallon pails around here. (I got my last stack from a local microbrewery for free.) I drew a three-inch circle in the center of the bottom of each container (Next time, I would make the opening a little smaller.) My husband cut the holes with a jigsaw. I cut a slit in a section of newspaper and laid it in the bottom of each pail. I nipped off the side branches of my tomato leaving only a few branches around the growing tip and slid the tomato’s root ball and bare stem through the hole (from the outside of the pail) and up through the slit in the newspaper in the bottom of the pail. (Once surrounded by soil inside the bucket, this bare stem will produce lots of roots!) The paper formed a collar around the stem to prevent muddy dirt from falling out when I water.
Next, I added potting soil that I had made: one part top soil, one part peat moss, one-half part perlite, and two parts rough compost (about the texture of peat moss). It is a good idea to get another person to help you when you fill the container. It is a bit awkward to hold the root ball while balancing the container on the edge of something and filling in around the plant with potting mixture.
I put lids on my containers and hung them up before watering. You could do without lids, but I didn’t want birds building nests in the top of the pails! I also wired the bales of the buckets to the supports we hung them from so they wouldn’t swing off during a thunderstorm or high wind.
The tomatoes I chose to grow upside-downare indeterminate (not patio or husky container-type hybrids) end-of-the-season bargains. One is a cherry and the other is a mystery plant that had lost its tag. (At 64 cents, I was willing to be surprised.)
I’m watching them grow now. We’ve been having perfect tomato growing weather. Hot and humid 80°F plus days and nights in the 60°F range. I’ll keep you updated. Begonia
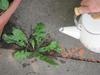
I wage war at this time of year—a war with weeds. The ones in the vegetable gardens are controlled by mulch. I hand weed as needed the few that struggle up through the thick cover. My “no till garden” is hay covered and takes about a half hour every two or three weeks to weed.
It’s the weeds that come up in the cracks of my sidewalk and rock paths that are my greatest challenge. Some volunteers I welcome, such as the pink panda strawberries and the creeping thyme. Others are just Bad Seed. I’m talking about the ones with long stubborn tap roots or tops that come off in your hand, while the real problem remains in the ground to cause trouble again.
I’ve seen people burn them and poison them—expensive and dangerous. I prefer boiling them.
I use whatever hot water I have in the kettle after making tea or coffee. I even have ladled the boiling water from my canner on the beasties! One application is usually sufficient. The really tough ones might need a couple of dousings.
Don’t bloody your knuckles pulling weeds this summer. Try the boiling water method. Begonia
My garden is filled with hardy plants suited to our hot summers and cold winters.I used to spend way too much money on plants that died or didn’t reproduce themselves well on My Little Farm in Town.Although I still buy a new plant to try out now and then, I mainly trade with other local gardeners or buy plants at backyard and garden club plant sales in my area.
There are a number of advantages to adding to your garden this way:
1.These are plants that have already made it through the winter here and will probably make it through the summer, too.
2.They are accustomed to the soil type and pH of the area.
3.The price is a lot less then retail prices.
4.I can talk to the person who grew the plant I am interested in buying for cultural information and sometimes can even see where he or she dug it.
5.There is an opportunity to trade plants and no money changes hands.
6.Goodwill and generosity are common—sometimes a fellow gardener will just GIVE you free plants.
7.Often if you get a plant locally and lose all of it one winter, your neighbor or the person who originally gave it to you will be able to give you another piece to replace it.
So next time your neighbor offers you a plant you consider local or common, just take it, smile, and say thank you. It may just become the anchor in an area of your garden that never fails to produce color and inspiration. Begonia
We’ve eaten our last salad from the greens I planted in March. They were pretty toasted and starting to bolt. I gathered them for one meal for the whole family—human and feathered. Not much gets wasted on My Little Farm in Town!
After harvesting and a little weeding, I refreshed each side of the frame with compost. I’ll give the frame a rest while I tend other parts of the garden, until it is time to plant again in hot, dry August for fall and winter harvest. My goal is a fresh salad for Christmas! Begonia
I’ve been peeking! I’ve been watering and lifting the mulch every couple of days to see how the potatoes in hay are progressing. I wanted to see if they were growing and if I was watering enough since the south side of my house if such a dry area.
It turns out that at first I wasn’t watering enough. It was too dry at ground level under the amount of hay mulch you see pictured in my May 3 blog, Experiment: Hay Potatoes and Ruth Stout. The potatoes were just sitting there doing nothing.
I started watering more and underestimated the ability of mulch to keep the ground wet! I found one tater that had rot on its sprouts—bad! I’ve since removed some of the mulch and left enough for the spuds to be in the dark but not so much that they stay too wet.
I checked the bed again today and found it damp but not too wet. The potatoes are sprouting nicely. I’ll add more hay as they grow up through what is mulching them now. Begonia
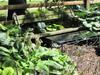
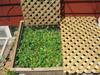
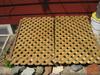
Chickens aren’t the only living things that need some special care in this heat. My Little Cold Frame is also showing signs of stress. I used to garden for an amazing woman who had an expanse of cold frames that she used (when I knew her) mainly to protect and nurture seedlings of rare varieties of primula. Each frame was fitted with a window screen. The screening provided just enough shade to guard against sun stress.
I chose common garden lattice to protect the plants in my cold frame from too much sun,because I had it on hand, it is rigid enough to use without attaching to a frame, and easy to store in sections. I found the two pieces I use for the purpose at a garage sale (25 cents each) a couple years ago. I lay the pieces right on top of the frame in place of the window glass. Lettuce and other greens are apt to bolt (flower and form seeds) and become bitter in hot weather, so the cooler I can keep them—the longer I will be enjoying salads from the cold frame.
I also have been watering more often. The south side of my house is not only warmer but also drier than any other side. I sometimes have to water several times time a day during hot weather. I try to harvest first thing in the morning but sometimes break the rule and crisp the cut greens by submerging them in cold water. (I use a salad spinner to get rid of the excess water.)
I’m going to stop writing now and harvest some greens from the frame for supper. We are having chef salads with eggs from our hens and greens from our cold frame.There’s nothing like a cold supper that doesn’t heat up the house on a hot evening! Begonia
I’ve thought about growing strawberries, read about growing strawberries, watched other people grow strawberries, and finally—I decided to actually try growing strawberries in our sunny front yard this year. I knew enough about STRAWBERRIES by that time to choose everbearingvarieties because I wanted a more sustained harvest, the plants are supposed to be smaller, and I wanted them to spread out and hold the slope where I planted them. (I “contour garden” in that part of the front yard, so at least some of them were going to have to be “sidehill” strawberries!)
I turned to my county extension website for detailed culture information for my part of Wisconsin. Most states have this service.In my county, you can access information on line and download a lot of it for free at http://www.uwex.edu/ces/ .
I planted the strawberries in an area of the yard where I had previously grown tomatoes and peppers, though it is not recommended.There should be some die-off of one of the varieties I planted that is not winter hardy—Tristar. Perhaps next yearI will plant carrots in that bed!
I have already nipped off the first flowers from the plants as per the package instructions. I am supposed to pinch off the flowers for at least 6 weeks in order for the plant to put its energy into growing leaves and roots rather than setting and developing fruit.
I really don’t know if this adventure in strawberries will bear fruit (groan), but it should be interesting. Begonia
I’ve been reading about growing potatoes in hay. I know people who have done it. I’ve even tired it—and failed! In the last article I read about the method, the guy layered spoiled hay with goat manure in it and potatoes and some dirt in a trench. Since I am sheet mulching a new bed in the front yard, I don’t have a lot of chicken yard hay—partially composted straw and chicken manure—available. I decided to use some spoiled hay and unscreened compost instead. I figure I can layer on some more organic material as it becomes available.
This way of growing potatoes is not new. Ruth Stout wrote about growing whole gardens this way back in the 1950s and earlier. (There is a video of Ruth in her 90s talking about her life, garden method, and planting potatoes on Youtube: http://www.youtube.com/watch?v=A9ReIotPNVM .)
Most of the stuff I am reading now is just repackaged Ruth Stout and her Mulch Gardening Method. She would say, “My Garden Is My Compost Pile!”Rodale published one of her books in the 1970s entitled The Ruth Stout No-Work Garden Book, and Cornerstone republished her How to Have a Green Thumb Without an Aching Backat about that time as well. She has a great down-to-earth conversational writing style and a fine sense of humor. I enjoy rereading her work and find myself gardening more like she did every year as my back gets crankier and my gardens get bigger.
I hope you enjoy reading and watching Ruth and perhaps trying out her method this growing season. She was quite a grand gal. I hope I am doing and gardening when I am her age! Begonia
In the interest of full disclosure, I have to show you the results of forgetting ... to openyour cold frame when it gets sunny and 60°F! I was preoccupied with garage saling for a couple of days. I came home, collected eggs, dug some greens for the chicks, grabbed a bite to eat, and out I’d go again! There were maybe a hundred sales going on in a one mile radius of my home—potent stuff.
The radishes seemed most affected. There was also some burn and wilting in the greens. I opened the frame and gave them all a good watering.I’m hoping that there is no lasting harm. If things bolt (go to seed), I’ll know the cause, chalk it up to experience, and replant.
I know there are automatic gizmos that will raise and lower vents in greenhouses and the lids of cold frames, but they are pretty pricey—well beyond what I can afford.It’s not a big problem since I am home most days. It also gives me an opportunity to watch everything grow! Begonia
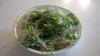
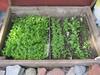
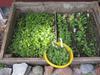
I harvested my first salad from the frame. I used a kitchen scissors to cut the mesclun mix. I also did my final thinning of the radishes and my pitiful spinach. I used the greens from my radishes in a stir fry that night for supper.Radish greens are very good added to a stir fry in the last few minutes of cooking so that they wilt. They are very scratchy, so I don’t use them raw in salad. (I also slice and stir fry the roots when I have them.)
The second planting of mesclun mix on the right side of the frame is coming on nicely and should be ready by the time the left side begins to bolt and is fed to the hens. I’ll then use that space to harden off tomatoes and peppers. Begonia
Spring is in full swing here in the Midwest! I’ve been doing a lot of potting and planting this past week.I’ve been repurposing a lot of old blinds or slats taken out of new blinds when shortening them.They make great plant labels and row markers!
I prefer to use metal rather than plastic or wooden blinds because wood rots and plastic becomes brittle and doesn’t hold permanent marker or graphite pencil markings through a whole season. The metal also lasts more than one season, and because it is painted, doesn’t rust.
The metal blinds cut easily with a kitchen scissors. (This kind of cutting can dull scissors, so don’t use your best pair!) I label with an indelible marker in a dark color on one side of the cut-to-size blind. If I want to use it over again with a different plant next year, I just wash in warm soapy water or wipe with a damp cloth and label on the other end.
I hope this tip comes in handy for you while you garden this Spring. Begonia
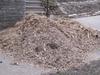
Every spring some part of my yard needs the wood chip mulch renewed. Our village used to deliver the wood chips they made from the trees they had trimmed and the brush and tree limbs that people put out on the street for them to pick up. (Yes, I know that not many cities even pick up your brush much less bring you the chips just because you are a tax payer anymore!) We still have access to them at the village compost site—it just means shoveling chips twice rather than once. My back isn’t that great, and my husband has other chores to do, so I’ve had to think of a new strategy for getting the chips that I need.
When I noticed a tree service truck pass my house and heard a big chainsaw working down the street, I put on my shoes and tracked the sound to its source.I noted the partially loaded truck box and carefully approached the people working to cut up the last of a very large cottonwood.I waited for them to notice me and then asked if they would be willing to drop their partial load of chips in my driveway rather than hauling them 25 miles back to their dump site. I also pointed out that they would probably get better mileage home if they gave them to me!
They laughed and said, “Sure!”
So I have a nice manageably sized pile of wood chips to renew the surface of my north side yard—forfree.Don’t be afraid to ask for what you need—especially if you are creating a win-win situation! Begonia
Note: Be sure to enquire if the load contains black walnut or anything diseased.
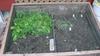
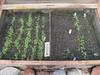
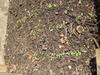
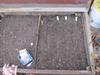
The weather has warmed and most of the seeds I planted earlier in the month have germinated and are growing well. My spinach and radishes were getting crowded, so I thinned them and will add the thinnings to my next salad! One area did not germinate at all. I have no idea what caused the failure—I just replanted. The result will be another batch of greens that will be ready for harvest while the plants in the other side of the frame recover. All’s well that ends well.
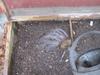
I opened the frame yesterday because we had a fairly warm day (50°F). When I went out to uncover the frame this morning, I found that we’d had a visitor the day before (MR. SQUIRREL). Fortunately, he hadn’t dug up any of the planted areas. I imagine he was looking for the black walnut I unearthed while planting the box!
I placed my repurposed plastic-coated wire screen over the frame after replanting and watering, and I’ll leave it in place. It will be no problem to water through the wire, and the window of the frame will stack neatly on top of it.
I’m looking forward to more warm days and maybe some rain. Soon it will be time to hook up the rain barrels to the house gutters again. The plants do so much better with rain water.Begonia
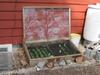
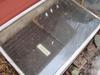
The temperature has finally risen above freezing, and I have just come in from uncovering the cold frame. I cover it with two-inch Styrofoam insulation board when the temperatures drop into the low thirties at night. Our low was 20 F early this morning.Our frost date in this part of Wisconsin is May 21, so I’ll probably have a few more cold nights!
I waited for the sun to come around and shine on the cold frame before uncovering it. The temperature was a little above freezing inside the frame. A completely insulated box would be warmer, but I’ve had good luck with the insulation board so far. Once uncovered, the frame warms up quickly with even a little bit of solar. The types of plants I have in the frame withstand cold well: radishes, mesclun mix (cut-and-come-again greens), and spinach (which is all up now).
The bird bath is frozen solid, but it still is looking like spring in the cold frame! Growing green, Begonia
We’ve had a run of warm weather (50s and 60s F).Everyone seems to be out raking and piling branches by the street for the village guys to pick up. My daughter-in-law and I raked up branches dropped by our giant weeping willow from the neighbors’ lawns. We had a terrible ice storm at Christmas time that took down a couple of giant branches. My husband and son took care of most of the debris at the time, but there were still plenty of thin branches to rake after the snow melted. My back lawn is still a disaster area! I’ll be raking it a little at a time in the next week.
There is still no green grass to speak of, but the crocuses are blooming and the honey bees are busy. (I hope they have a warm hive to retreat to because winter isn’t done yet. There is always a big snow storm at the beginning of April before it finally settles down to being spring around here.) I am leaving most of my beds alone until I know it is really going to be spring. I don’t want to expose any new growth to the last severe freezes.
The cold frame has been anything but cold. I have had it open on several days. One day I was late getting out to open it and found the temperature reading 110F. (Bad gardener—no biscuit!) It is propped open with two bricks today. I am watering regularly, especially the soil nearest the house. I have tiny sprouts coming up of mesclun mix and radishes. There is no sign of spinach yet.
It isn’t truly Spring yet, but we are all appreciating this mild weather one day at a time. Begonia
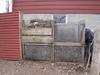
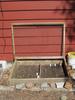
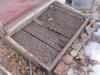
I’ve got the fever. Temperatures are going to be in the 40s (F) for the next four or five days. It’s time to plant the cold frame.
Last year was my first season using the cold frame on the south side of the house. I wish I had room for a couple more! My husband made it for me out of scrap wood and one of three large storm windows I junk picked from a neighbor years ago. (The other two are installed in the south wall of the chicken coop with a three- inch air space between for insulation value.) I planted greens in March and then harvested in April and replanted with cabbage and broccoli for transplant. I used the frame for hardening off seedlings in May. This year I’d like to see how long I can extend the growing and harvesting season by planting another crop of greens in August/September.
It wasn’t as complicated as I thought to grow things in the cold frame. I did have to pay attention to temperature and open the frame when it got too hot inside. Watering was a key issue as well. It dries out fast when the sun is shining. I had some problems with squirrels digging around on warm days, but this year I am going to cover it with a screen of ½-inch hardware cloth from a dismantled chick play pen.
I prepared the soil in the frame last fall so it would be easy to pop the seeds in and water. Today, I divided the frame into two parts and planted two kinds of cut-and-come-again greens (mesclun) mixes plus spinach and radishes. I’ll have to cover the frame with Styrofoam insulation board at night until the temperatures quit falling into the 20s and teens (F).
Some good references for extended season and four season gardening are Building and Using Cold Frames by Charles Siegchrist in Storey’s Country Wisdom Bulletin series (www.Storey.com) and Four-Season Harvest: Organic Vegetables from Your Home Garden All Year Long by Eliot Coleman, Barbara Damrosch, and Kathy Bray.
I can hardly wait to taste that first salad! Begonia
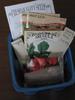
I’ve been ordering seeds from Le Jardin du Gourmet for over 15 years, ever since I got ahold of one of those post cards with all the herb seed sample packets for 35 cents each.I was able to experiment with growing all kinds of herbs for a very small cash outlay. They offer sample seed packs on all of their seeds: herbs, flowers, and vegetables. Their regular size seed packets are only $1 each, and the flat rate for shipping and handling seeds is $3.50 (outside the United States $8.50).
The amazing thing is that these are really good quality seeds. There is nothing fancy about their catalog or packaging, but I’ve never had a problem with germination or with mislabeled seed. They also offer heirloom varieties of tomatoes. I buy a lot of my greens seed from them. They have a nice mesclun mix and many varieties of lettuce, mache, spinach, and radishes. They also offer one of the widest varieties of herb seed I’ve come across.
I like to order the sample packets of herbs especially, because My Little Farm in Town is. . . . Little! I don’t need more than six sage plants at a time. If you are living in an apartment or condo and want to grow a few vegetables or herbs in pots on your balcony or deck, you only have to buy what you need.
You can go to their web site www.ArtisticGardens.comto check out everything they have to offer. Begonia
Disclaimer: MyFrugalLife.com cannot accept any responsibility for any injury or damage that you may cause to yourself, others, or property when following any advice given on this site. MyFrugalLife.com has no control of how you may use information you get from this site and does not attest to the validity of any information found within. Much of this information comes from third parties (newsletter readers and other contributers). Use advice found in our newsletters and on our site with common sense and at your own risk. If you see something in our newsletters or on our site that you disagree with, please let us know. Our goal is print only valuable information and advice.