Comments
Thursday, July 05, 2012
Hi Pam: Just wanted you to know that I am still reading and enjoying your posts! Unfortunately, the folks who oversee this site don't seem to be allowing comments any more. So--you have to have a blog on this site in order to give feedback! Take care, Begonia
P.S. Thanks for the Mod Podge tip. I am going to try that!
0 Comments | Post Feedback |
|
Easter Menu
Sunday, April 15, 2012
Dear Chrystal:
Sounds like you had delightful meal! Here's what I made for Easter dinner.
-
Ham--89 cents per pound with a $50 purchase at the local grocery store.
-
Party Bean Casserole--bacon, onion, brown sugar, cider vinegar sauce mixed into butter beans, lima beans, kidney beans, and Bush's baked beans
-
Fruit Salad--fresh pineapple, apples, bananas, manderine oranges, and canned sweet cherries
-
Sweet Corn
-
Potatoes Delmonico--small red potatoes, boiled until tender with the skins on and sliced with a thick cream white sauce and cheddar cheese on top. Baked in a casserole until bubbly
-
Lamb pound cake frosted with mallow whip and coconut with jelly bean eyes (for a picture see my website mylittlefarmintown.com. The pound cake is made with butter and a can of coconut milk! Talk about breakin' trainin'
-
Ice Tea with papaya ice cubes and Kick Ass coffee (wonderful coffee despite the name)
What did you have for Easter Dinner Pam? Begonia
0 Comments | Post Feedback |
|
First "Garage" Sales of the Year!
Monday, March 07, 2011
I went to my first two “garage” sales of the year on February 26! The date is important because every year my sisters and I have an informal competition as to who will be the first to attend a “sale.” (I know that I am late writing about them, but a lot has been going on!) One sale was took place in our town’s senior center and was sponsored by a local mom’s group. The other was a 10-family sale held in a church basement in a neighboring town.
Don’t you just love a sale where everything is 25 cents unless marked otherwise? I found my first Christmas present of the year—the rather alarming frog sconce—and a NEW 6-liter, stainless steel pressure cooker someone bought from QVC and then never used. (I’ve come to the conclusion that we Americans are a bit weird about pressure cookers. We like the idea of them, but we are scared to death to use them. I’ve noticed on the web that other countries have whole shops of nothing but pressure cookers, but outside of the Presto brand, they are as scant as hen’s teeth here.) I could have gotten the pressure cooker for 25 cents because it wasn’t marked otherwise, but I would have felt guilty every time I looked at it. The woman checking me out charged me $2 instead!
I also found a hot plate in mint condition for $2 (another item I can cross off my Master List—still haven’t found a Vitamix yet)! It will come in handy when my husband takes the cooktop area apart to tile the counter and retile the backsplash. I figure if I could get along without an oven for 6+ months, I can do without a cooktop for a while, too. My pressure cookers will come in handy then!
Most of the things I found were useful things I am using to replace stuff that is worn out. The stout Chinese basket will hold my stationary and letter writing supplies; the soap dish will replace a chipped one that has seen better days; and the diskette labels are just handy. The baby stuff will go to my daughter in law. The candle holder is something I didn’t need but just wanted. The mini-beanies are from a FREE box and will go to missionaries.
I think that ONCE AGAIN I am the first in my immediate family to have gone to and purchased items at a garage sale (two actually!). I don’t want to hear any SNARKY comments girls (Who’s the woman?—Who’s the Woman?!) about whether these can actually be considered “garage” sales, because they were held indoors and in public buildings! No nitpicking or sour grapes—you can always try again (futilely, I’m sure) to be FIRST next year! Begonia
Images:
2 Comments | Post Feedback |
|
Frugal Family Fun: Mitchell Park Conservatory (The Domes) Milwaukee
Saturday, March 05, 2011
We visited Mitchell Park Conservatory (The Domes) in Milwaukee this past weekend (http://county.milwaukee.gov/MitchellParkConserva10116.htm). It wasn’t a totally frugal outing forus because we are not local. We had the additional expense of gas and a meal eaten out. However, many cities have conservatories or public gardens that are wonderful thrifty destinations for family outings.
Our visit to the domes was perfect for this time of year because it was an indoor activity that felt like an outdoor activity. It was a sunny day so the temperatures inside the domes were perfect for giving the impression that we had escaped to somewhere warm and sunny! Mitchell Park Conservatory consists of three distinct domes linked by a large lobby. There is a tropical dome with water and some huge palms and other specimen trees. There were places to sit and the sound of water and the smell of tropical blooms and fruit. It felt good to sweat again! Click on the following link for a two minute tour: http://www.youtube.com/watch?v=ce4g2nSbC_s&feature=related.
Another of the three domes is a desert habitat. This dome was my favorite. I loved the architectural quality of all the plants. I liked all the textures and the alien feel of the place. It is totally different from anything I experience at any time of the year in the Midwest. I think that is the essence of any vacation or getaway—that feeling of being somewhere totally different from your ordinary life. The desert dome also was worth the modest entrance fee.
The third dome is used for changing seasonal displays. We were able to take in the a train show there while we were there ( http://www.youtube.com/watch?v=cfYH2EJSoBM&feature=related) . This dome is also set up for other programming, such as music and light shows (http://www.youtube.com/watch?v=xqGaa24uUSY) . The train displays spilled out into the lobby. The setups were very fun and detailed. The more you looked, the more you would see. The Lego train layout inside the display dome was especially impressive, and it was only a quarter of its total size!
After visiting the domes, I had the feeling that I had been away for a weekend rather than a few hours. That feeling of compressed time is a sure sign that you’ve gotten the most from your time away from the ordinary. Begonia
Images:
0 Comments | Post Feedback |
|
Sprouting: Cheaper than Lettuce!
Wednesday, March 02, 2011
I about had a stroke last night in the produce section of our local grocery store—right in front of the iceberg lettuce! The heads were small and misshapen and almost $3 each. The romaine lettuce was almost $8 for three heads in a plastic zip top bag. I turned to my daughter and said, “NO WAY!”
This is the time of the year when we really get serious about sprouting. We use sprouts to replace some of the lettuce in salad and as a substitute for it on sandwiches and in roll ups.
Sprouting has many advantages:
· Sprouting seed costs very little per ounce for the amount of food that it turns into within a few days of germination. (You can be eating sprouts in as little as 3-7 days.)
· It is one of your best fresh/live food values. (I bought raw organic hulless sunflower seed yesterday for 74 cents a pound, and it only takes two tablespoons per sprouting tray.)
· Sprouts are full of vitamins and minerals.
· Food just doesn’t come any fresher or more local.
· The seed stores well and doesn’t take up much space. All you need is a clean container and a dark, dry, cool pantry or kitchen cabinet to store them.
My mom started sprouting alfalfa seeds in the 1970s. She used Mason jars with screen lids and used the resulting sprouts in salads. She also experimented with other mixtures of seed. She would soak the seeds in warm water in the jar for a while and then drain away the water through the mesh lid. Every day afterward, she would rinse the seeds in the morning and evening. After they germinated, the rinsing would carry away the hulls. Eventually, she would have a jar full of tangled sprouts. She kept the sprouting jars on their sides under the kitchen sink during this process.
There are many more complex contraptions today for sprouting, and they can be quite expensive. The jar and screen lid method is still one of the cheapest around. I’ve tried various styles of sprouting and have settled on a couple that are quick, easy, and meet my family’s needs.
I use a stacked siphon sprouter (Bioset Kitchen Salad Garden) most of the time. This sprouter works well for small as well as large seeds. It has a top tray with a siphon that drops water down into the next tray and so on through three trays and finally into a bottom reservoir. When all the water has drained to this bottom tray, I empty it and that is it. I make it part of my morning and evening routine and always keep the sprouter out on my kitchen counter next to the radio. (If you pack the sprouter away, you probably won’t get it out and use it.)
I also have a simple tray-style sprouter in which the rinse water drops straight through that works better for sunflower seeds and larger seeds. I find I have to rinse more often with this sprouter so the sprouts don’t dry out.
Johnny’s Seed ( www.johnnyseeds.com ) sells the Bioset sprouter and a selection of sprouting seeds. Many other seed companies sell sprouting seeds and sprouters, including Jung ( www.jungseed.com ), Thompson & Morgan ( www.tmseeds.com ), and R.H. Shumway ( www.rhshumway.com ) to name only a few. Thompson & Morgan and Johnny’s have the widest selection of sprouting seed, but R.H. Shumway has some of the lowest prices. I have also bought sprouting seed at bulk and natural food stores. The advantage of these stores is that you don’t have to pay postage!
Give sprouting a try. At the price of lettuce and other fresh vegetables right now, you could buy a sprouter and some seed for the price of one trip the grocery store produce section! Begonia
Images:
2 Comments | Post Feedback |
|
Death by Chocolate Again: The Countless Lives of Chocoholics
Wednesday, February 23, 2011
I participated in the 6th Annual Death by Chocolate event at my local public library this past weekend. (See my Feb. 21, 2010 blog, “Death by Chocolate.") Again guests were met at the door by a tuxedo clad volunteer. Live music played in the background as tasters sampled chocolate in all its forms—cakes, tortes, cheese cakes, brownies, cookies, candy, and even trifle. All this was made sweeter because this is a FREE event for the tasters! A generous supply of bottled water (stacked on a book cart!) was available to cleanse palates.
Each guest was asked to pick a category and taste the entire selection of that table before casting a vote. There were nine other entries in my category which included anything chocolate that wasn’t cake, cookies, cheese cake, or brownies.
I had tried a new combination of truffle flavors (my usuals are almond, pecan, lemon, orange, rum, and peppermint) at Christmas time because I ran out of chocolate chips the day I was making candy to donate to the Friends of the Library Cookie Walk. I had picked up a number of packages of Nestles peanut butter and milk chocolate chips at my favorite surplus grocery store (at under a dollar per package), and I had some honey roasted peanuts in the house as well. So I used what I had on hand to create this new (to me) truffle flavor combo and called them Honey Roasted Peanut Butter Cup Truffles!
These truffles have the winning combination of salty and sweet PLUS chocolate and peanut butter! People seemed to like them, which resulted in my winning the People’s Choice Award in my category. Here is the recipe if you would like to make them at home. These truffles are easy to make and only require a few ingredients and a microwave.
Honey Roasted Peanut Butter Cup Truffles
8 ounces Nestles peanut butter and milk chocolate morsels (use a small food scale to weigh your chocolate)
¼ cup butter (I used unsalted butter.)
¼ cup heavy whipping cream
¼ teaspoon vanilla
¾ cup chopped honey roasted peanuts
Whole peanuts for garnish
1. Place 24 candy cups in minimuffin tins
2. Spoon ½ teaspoon chopped peanuts into the bottom of each candy cup.
3. In a 2-quart microwave safe bowl, combine chocolate and butter. Microwave at 50% power for 1 ½ to 2 minutes or until melted.
4. Add cream and vanilla extract and beat with an electric handmixer until glossy and slightly thickened. Scrape the sides of the bowl occasionally.
5. Immediately ladle into paper candy cups.
6. Garnish with whole honey roasted peanuts and refrigerate until set up.
I like this recipe because I don’t have the mess of forming and dipping the truffles. I made (and washed dishes after) 5 or 6 batches of candy in the time it took for my VHS copies of Monolith Monsters and When Worlds Collide to play through from trailers to catastrophic conclusions. I broke even on materials because I won $15, which covered the $5 entry fee and the minimal expense of a few extra bags of chips and peanuts. My husband and I had a nice evening tasting great chocolate desserts and catching up with neighbors we hadn’t seen since the snow fell—and then we went out for a romantic dinner of salad! Begonia
Images:
3 Comments | Post Feedback |
|
Free Books and Sheet Music Online
Monday, February 21, 2011
I moderate a teen book discussion group for our local homeschool group once a month. This month we are discussing G.K. Chesterton and mysteries as a genre. We have an excellent public library system with over 30 linked libraries, but it is surprisingly thin on G. K. Chesterton!
We are reading the Best of Father Brown, a series of short mysteries starring the unassuming man of the cloth sleuth. (Don’t you love that word “sleuth”?) When one of the families that are participating let me know that they weren’t able to get the book from the library, I started poking around online looking for sites that might have a readable or downloadable version of the stories. I found a “fan” site that specialized in all of G. K. Chesterton’s works and e-mailed the URL to that family so they could have their reading and research done by the group would meet (http://www.gkc.org.uk/gkc/books/index.html ).
In the process of searching for this information, I found some sites that I thought might be of interest to anyone who has web access by doesn’t have to a big library system or who might live in a state that requires fees for library use. If you are a homeschooler, you have probably sacrificed an income to be at home with your children and these sites could enrich your homeschool hugely.
If you are a homesteader or have embraced “voluntary” or “involuntary” simplicity, a lot of these older, public domain books (published before 1923 with unrenewed copyrights) may help you to learn basic living skills affordably. Here is a short list:
· http://librivox.org/ Librivox: Acoustical Liberation of Books in the Public Domain
· http://www.publicdomainsherpa.com/find-public-domain-books.html List of public domain sites with nice descriptions of how the materials can be used.
· http://www.publicdomainsherpa.com/free-sheet-music.html Public domain sheet music!
(Public Domain Sherpa also gives important information on copyright and how the materials can be used.)
The sun goes down early at this time of year. Settle down somewhere comfortable with a hot drink and enjoy a good FREE read! Begonia
Images:
0 Comments | Post Feedback |
|
Pictures: A Winter Walk in Wisconsin
Wednesday, February 16, 2011
We are having our annual February thaw here on My Little Farm in Town! That is just southern Wisconsin in the winter—a little false spring and then back to winter again for a couple of months!
We took the opportunity last weekend to do some snowshoeing in Donald County Park before the snow melted too much. (We will probably have some more snow, but it won’t be of the same quality as the early winter snow cover.) I remembered to bring my camera with this time and thought I would share some of the pictures I took of the landscape, including Donald Rock and Big Springs with you today. (See my Jan. 9 blog, Snowshoeing in Donald Park.) Begonia
Images:
1 Comments | Post Feedback |
|
Frugal Family Fun: Volunteering at the Wisconsin Garden Expo
Monday, February 14, 2011
We volunteered as a family at the Wisconsin Garden Expo (http://www.wigardenexpo.com/) yesterday. It was a nice change. There were crowds of people, plants, fountains, seeds, and all manner of garden ornaments! We served with another couple in the Donald Park information booth, answering questions about the park and what it has to offer. Many people had never heard of the park and wanted directions and information about what they could do when they got there.
Together we shared information and met a lot of people. My daughter invited people in answered questions, and talked about things you could do in the park—so much for homeschoolers being socially backward! My husband gave a lot of directions as to how to get to the park.
We’ve been volunteering at Donald County Park individually and as a family for the past 8 years in various capacities as trail stewards, blue bird house trail recorders, poetry trail maintenance people, prairie seed collectors, Tuesday work crew workers, and helpers on various archaeology projects.
We’ve had some very good times and stored up some very pleasant collective memories as a family over the years. One of the wonderful parts of volunteering for events is that you get a free pass and usually free parking. When you are not volunteering, you get to explore the whole event.
My daughter used the volunteer opportunity to earn another point toward her 4-H Silver achievement award. My husband got ideas for outdoor projects. The high point for me was finding open-pollinated peony seeds (for only $2 per packet) and instructions for how to propagate them from seed. I also found enough free information to plan new Frugal Family activities for the rest of the year! Begonia
Images:
3 Comments | Post Feedback |
|
Chicken Treats: Suet Cage O' Greens
Thursday, February 10, 2011
Feeling “all cooped up” is literally true for many chickens at this time of year. With all these snow storms and cold snaps, my girls have been confined to their coop more this year than any other in their short chicken lives. It has got to be pretty boring.
I like to give my hens greens from time to time throughout the winter. Whenever I make a salad, I save the outer leaves and core for my little girls. That is where the suet cage comes in.
I bought a large NEW square suet cage from my local wild bird seed supplier. (It is important that the cage be new and not used because wild birds carry all kinds of bird diseases.) I suspend the cage on a chain that I hang from a nail in a rafter of the coop. I use chain to make it easier to change the height of the hanging cage. As the amount of bedding in the coop rises and falls over the course of the winter, I can easily adjust the length of the chain to suit.
I hang the cage of treats just high enough that the hens have to stretch a little to reach it. I use a double-ended snap to attach the cage to the chain. It also makes detaching and attaching the cage to the chain easy. When not in use, I hang the cage itself on the same nail in the rafter that supports the chain.
As the birds peck at the greens in the cage, it swings around wildly, requiring the hens to judge the swing of the cage to get their next bite. It keeps their pea brains stimulated and their naughty beaks busy. It’s the chicken equivalent of tether ball! Begonia
Images:
0 Comments | Post Feedback |
|
Frugal Family Fun: Snowshoeing
Tuesday, February 08, 2011
Snowshoeing is an activity that even the youngest member of the family can do well from the minute they strap the snowshoes on their feet. If you can walk, you can snowshoe. There is almost no learning curve. You can start enjoying yourselves and the great outdoors immediately!
Snowshoes have metal crampons in their bottoms so you can climb icy and snow covered slopes. Steep declines are like skiing on pillows. If you fall down, it isn’t hard to get up.
We have been snowshoeing county parks (free!) as a family now that we all have snowshoes again. This Sunday we chose to explore Stewart County Park in Dane County, Wisconsin for our weekly family outing. This is the oldest park in Dane County and is in the process of being rejuvenated. We chose a new trial in the lower part of the park that crossed and recrossed a stream filled with watercress that eventually rejoined an older trail that took us up into one of the parks' prairie areas.
I just bought my daughter a new pair of snowshoes after Christmas for under $100 on clearance from Sierrtradingpost.com. You can spend a lot of money or very little, but generally, the cash outlay to get started snowshoeing is small compared to other winter sports like skiing or hockey. Many manufacturers sell starter kits that include snowshoes, poles, gaiters, and a carrying bag for a reasonable price.
There used to be two basic types of snowshoes: Bear Paws (round snowshoes) and Alaskans (long ovals with tails). Both were made of wood and leather, and the bindings were sold separately. Now there are many types for a variety of forms of snowshoeing from mountaineering to trail running and day hiking http://www.sierratradingpost.com/lp2/snowshoes.html . The bindings are now part of the snowshoe, and the snowshoes are made of light, strong, space age materials. You can learn enough to make an educated buying decision by visiting just a few manufacturers’ sites (Tubbs, Atlas, Redfeather to name a few).
Snowshoeing is quiet and allows you to get into areas of parks that you might never see in the summer, AND THERE ARE NO BUGS! You don’t even need a trail to snowshoe. (If you are sharing a trail with cross country skiers, however, be considerate and stay out of their tracks.) Snowshoeing is also great exercise.
No special clothing is necessary. (People who enjoy off-trail snowshoeing sometimes wear gaiters to keep snow from falling in the top of their boots.) In most cases, getting chilled is not a problem unless it is an extremely cold day. Layer your clothing so that you can shed garments as you warm up. If you are snowshoeing with young children:
-
Pick shorter routes and stick to trails until you know your children’s limits.
-
Warm boots that keep snow out are important.
-
Snow pants and a winter coat keep little ones dry.
-
Pack an extra pair of dry mittens and socks to replace wet ones.
-
Check small hands and feet periodically to be sure they are warm enough.
-
Bring a snack and some water if you are going to be hiking far.
All that is required is a snow cover of 6 or 8 inches. You do sink into drifts, but the snowshoes spread your weight enough that you can climb out of them. I like to use poles when I break a trail or tackle really deep snow. I use cross country ski poles, although they do make special snowshoeing poles.
There is nothing like winter in the woods. One of the best ways to enjoy it and your family is by snowshoeing together. Begonia
Images:
0 Comments | Post Feedback |
|
Digging Out
Sunday, February 06, 2011
We are all pretty much dug out of our snowdrifts now! The city crews are still moving snow in other parts of town, but they cleared most of the snow from our street and curb last Friday. Homeowners are responsible for digging out their driveways, walks, and the sidewalk and any fire hydrants in front of their houses.
It was pretty amazing to watch them haul away dump truck after dump truck of snow. They use one of the biggest snow blowers I’ve ever seen. For those of you who live in sunnier climes, I thought a few pictures of the cleanup might be interesting.
By the way, this snow blower can fill a dump truck in about 45 seconds! Begonia
Images:
1 Comments | Post Feedback |
|
Blizzard!
Wednesday, February 02, 2011
We’ve gotten over 16-20 inches of snow since Monday. It really blew last night with winds gusting up to 45 and 50 miles per hour. I found little snow drifts in the corners of the chicken coop this morning. My husband had to shovel through a waist-deep drift to free the furnace exhaust and intake pipes on the south side of the house, while being careful not to fall into window wells.
Road crews were working all night. We heard them working on the streets at 2:00 a.m., and the streets were plowed when we woke at 6:30--which is really quite amazing considering. Of course, there are still the 3 to 4-foot piles of snow between the sidewalk and plowed street to contend with. Good thing we don’t have anywhere to go today!
We put on our snowshoes this morning to check on elderly neighbors. I was concerned that their furnace pipes might be covered with snow drifts like ours were. They were fine. They had other worries. One had a dog that needed to go out, but her side door was drifted shut. Another just wanted to be able to open her front door. Even though she had nowhere to go, I think it made her feel less trapped. When these things happen, it is good to remember that you have neighbors, and they are all still there. It is easy to feel isolated otherwise. Count your blessings! Begonia
Images:
0 Comments | Post Feedback |
|
Entertaining Friends: Personal Pizzas
Monday, January 31, 2011
Entertaining is becoming a lost art for many families. People are getting too busy for people. Or they are just “peopled out” by the time they get home and hit the automatic garage door opener. It is easier to watch television, surf the net (!), or play a video game than invite guests and prepare the house and a meal for them.
It can also be challenging to find one dish that pleases a wide range of ages and preferences. Add vegetarianism and food allergies to the mix, and it can be hard to figure out what to serve guests! The goal is for everyone to feel comfortable and satisfied at the end of the evening. Make-Your-Own personal pizzas are always successful.
I start out by making the crusts. I have a very nice recipe for prebaked yeast crusts that don’t require any rising time and a minimum of handling. This crust freezes well and tastes great. I shared it with a friend who does once-a- month cooking, and it is popular with her large family. My daughter won reserve champion with this recipe at 4-H fair. It will be a winner with your guests, too.
Easy Pizza Crust
-
1 cup water, warm
-
1 teaspoon sugar
-
1 tablespoon yeast
-
1 teaspoon salt
-
1 ½ cups all-purpose flour
-
1 cup whole wheat flour
1. Combine water, yeast, and sugar and set aside.
2. Preheat oven to 350°F.
3. Combine rest of ingredients and add yeast mixture.
4. Stir well and turn out onto lightly floured board. Knead lightly until firm.
5. Cover dough with a towel and allow to rest for 5 to 10 minutes.
6. Divide dough into 12 pieces for personal size crusts or leave whole for a normal size pizza crust.
7. Roll out individual crusts and place on a lightly greased cookie sheet or pan dusted with cornmeal. Pierce with a fork.
8. Bake for 10-12 minutes, then remove crusts from oven, brush with oil, and add toppings.
9. Raise oven temperature to 450°F. Bake pizzas 10-15 minutes or until done.
Toppings:
-
Vegetables: Green peppers, mushrooms, onions, rehydrated sundried tomatoes, artichoke hearts, zucchini, lettuce, tomatoes, and spinach
-
Meat: Italian or Chorizo Sausage, Pepperonis, Canadian bacon (pineapple!), anchovies, chicken, meatballs, taco meat, hamburger
-
Sauces: Pesto, chunky tomato sauce, seasoned tomato sauce, sour cream, Alfredo sauce
-
Condiments: Greek, black, and green olives, garlic, pickled yellow peppers, capers, olive oil
-
Cheeses: Fontina, parmesan, mozzarella, cheddar, grana, queso fresco
-
Seasonings: Italian seasoning mix, oregano, basil, garlic salt, sea salt, black pepper, red pepper
The crusts and toppings can be prepared ahead, giving you time get your house in order! Serve with a green salad and drinks of your choice and you have an occasion for the whole family to enjoy. Begonia
Images:
2 Comments | Post Feedback |
|
Odd and Ends: Orange Peels
Wednesday, January 26, 2011
I love the smell when I am peeling an orange. Most of the time I cut them into slices for easier eating, and the peel goes into the compost pail when the meal is over. Sometimes when we need a quick snack on the go, we just take the whole orange and peel it in the car or when we get to our destination, and the peel goes in the trash if I don’t pack it home and throw it on the compost pile on the way into the house.
Years ago when oranges were precious treats eaten only at Christmas time, many mothers would confiscate the peels and use them in baking or to make into that delicacy, candied orange peel. http://candy.about.com/od/fruitcandy/r/candied_peel.htm
I think that fresh or frozen orange peel gives the best flavor to baked goods, so I try to have a small supply of it in the freezer at all times! Whenever I buy oranges I use my potato peeler to scrape the orange layer of the peel from one or two fruits after I have washed them with a dab of Dawn liquid dishwashing soap. Be sure to rinse all of the detergent off after you are done sudsing the fruit! (If you are worried about pesticide residue, buy organic fruit, but still be sure to wash the fruit well before peeling.) This method can also be used to save lemon and lime peel.
I place the citrus peels in a small tightly sealed plastic bag or container and store in the freezer. I have also stored them in the freezer wrapped tightly in foil. They freeze well, but beware of freezer burn. If the peels get too frosty, start over with a new batch.
Next time you eat an orange, don’t throw out all the peel—freeze some to use later! Begonia
Images:
0 Comments | Post Feedback |
|
Frugal Family Fun: Pizza and Football
Monday, January 24, 2011
It’s been a tad frigid here in Wisconsin on My Little Farm in Town. It is that time of the season. It is also that time of the season for football—playoffs. My husband was happy to have family time at home this week.
We had been entertaining friends and their families a couple of nights this week with make-your-own-personal pizza suppers. I had plenty of leftover toppings, crusts, and salad, so pizza was on the menu. One friend left us with ice cream and the other with brownies so we had dessert covered as well! (Thanks again!)
I know that I am unnatural, but I really don’t care for football that much. The ratio of physical trauma to entertainment value is skewed a bit too far toward “blood sport” for my taste—I do enjoy the funny commercials, though. It all works out in the end. We all sit under a blanket on the couch and eat pizza and brownies with vanilla ice cream. To pass the time between commercial breaks, I crochet or comment on the size and condition of various players. (“Wow! He sure is big. I didn’t know a leg could bend in that direction!”) The other members of my family actually follow the game. I ask my husband who is ahead every once in a while and judge by his mood at the end of the game whether or not the Packers won.
The important thing is that we all had a good time together. Stay warm. Begonia
Images:
0 Comments | Post Feedback |
|
First Eggs of 2011!
Saturday, January 22, 2011
This morning I found two newly laid eggs in one of the nesting boxes! My husband and I each had an egg for breakfast! The egg laying season has started on our little farm in town.
My hens started molting in the late autumn when the day length got too short for egg laying, which is kind of handy because birds don’t lay eggs when they are in full molt anyway. The downside was that I have such a small flock (four birds) that I had to use some supplemental heat in the coop to keep them alive until they got more feathers!
They are fully feathered again and the days are getting longer. The sun is setting at about 5:30, but it is still bitterly cold. This is the coldest part of the year for us. I don’t use artificial light in the coop. I want my chickens to sleep more when conditions are more crowded. I don’t want them awake getting bored and thinking about bad things to peck like each other or their own eggs.
Since they are both pets and egg and manure producers for my little farm in town, I don’t mind if they have a couple of “unproductive” months each year. I am in this for the long haul. These girls are never going to end up as stewed chicken, so they have a few more years to lay their eggs.
I noticed for the last three or four weeks that the girls have been hitting the oyster shell pretty hard. I’ve had to refill the quart jar in the feeder several times. In the last two weeks, the shavings in the nesting boxes had been disturbed. Last week, I came into the coop one evening to turn on the heater and found that they had been fighting over one of the boxes and had knocked off the front of it! I brushed out the dusty old shavings and replaced them with a fresh supply.
I’m going to keep better track of egg production this year. I have a chicken journal that I started a few years ago that I will use for the purpose. Now I have one more marker to gauge the coming of Spring! Begonia
Images:
0 Comments | Post Feedback |
|
Bulk Food: Buying Citrus--'Tis the Season
Friday, January 21, 2011
Citrus is in season and a good buy. In line with our New Year’s resolution to use money we would have spent eating out to buy fresh fruits and vegetables, we skipped a snack at Panera after our family time (another New Year’s Resolution!) visit to the art museum and visited a local fruit market instead!
The fruit market samples most of its fruit, so it is always easy to cave in to purchasing some out- of-season delicacy. The best tasting and cheapest fruit are usually the ones that are in season.
One section of the store is lined with stacked boxes of fruit. (The boxes contain approximately a bushel of fruit and weigh about 30 pounds each.) At this time of year, this area holds mostly citrus: several types of eating oranges and grapefruit; juicing oranges, and tangerines. The boxes varied in price by size of fruit with the smaller sizes being cheaper with higher counts of fruit per box. We ended up purchasing a box each of grapefruit and oranges. I went for a higher count with the grapefruit because I like to eat an entire fruit at one sitting and smaller fruits are better for that. I bought the medium grade of orange because I felt they were in better shape and there was only a couple dollars difference in price.
When buying bulk fruit, be sure to open the box that you want and check out the condition of the fruit and how it is packed. If the fruit is too bruised, it won’t store well and will rot before you can eat it—a waste of good fruit and good money! Ask to sample the fruit, if they won’t let you, buy your fruit somewhere else, or ask them if you can return the box if the fruit isn’t good. (Some grocery stores will let you do this.)
I store the fruit in our cool pantry (55°F) or in a cooler corner of the basement, and it keeps very well until we are ready to eat it. Be sure the temperature of your storage place doesn't drop below freezing. Frozen citrus is only good for the compost pile!
At this time of year in Wisconsin, the weather alternates between dreary gray and cold and bright blue and REALLY cold. Those boxes of citrus brighten the days until warmer weather. (I’d settle for temps in the high 20s F!) Begonia
Images:
0 Comments | Post Feedback |
|
Frugal Family Fun: Eagle Watching
Tuesday, January 18, 2011
This past Sunday afternoon, we went down to Lock and Dam No. 11 in Dubuque, Iowa, to view eagles. We have done this other years as well with varying results as far as numbers of eagles seen. Eagles can be found in our part of Wisconsin in the winter anywhere there is open water after the rivers and lakes have frozen over.
The colder the weather, the more water is covered with ice. The more ice, the more eagles congregate near the open water below locks and dams.
A couple of years ago during a spell of -0 F weather, the Mississippi River was frozen near Dubuque from shore to shore with no opening in the ice except around Lock and Dam No 11. (http://outdoors.webshots.com/photo/1407082356000603324vOdqLE ) That year we counted over 60 eagles on the ice, fishing in cracks, dipping into the water below the sluice gates of the dam, and perched in trees on the near and far shore of the river. http://www.jeffraflik.com/wintereagles05-06.htm
Other years, we have viewed the birds during Eagle Days in Sauk Prairie, Wisconsin, below the hydroelectric dam on the Wisconsin River. The city has created riverside viewing areas, and there are always educational displays, lectures, and raptor demonstrations by wildlife rehabilitators at one of the local schools. http://www.ferrybluffeaglecouncil.org/eagledays/index.html
This year we saw two birds along the divided highway on the way down to Dubuque, three near the lock and dam, and one on the way home! The reason for why there were so few birds around the locks became obvious as we walked along the top of the bluff overlooking the lock and dam and the river in Eagle Point Park. (We could see pockets of open water several miles upriver. (The river is about a mile wide behind the lock and dam at this point. Pickup trucks pulling ice fishing shanties onto the river ice looked like matchbox cars. This summertime picture should give you an idea of how wide the river is at this point. http://outdoors.webshots.com/photo/1409402321000603324OEaiqJ
If you are interested in viewing eagles in your state, check out this website: http://www.baldeagleinfo.com/eagle/eagle1.html it has a lot of great information for a great family outing! Dress warm and bring along some hot cocoa, binoculars, and your camera. Have fun! Begonia
P.S. In researching images for this blog entry, I came across this incredibly neat wildlife photo site. Enjoy!
http://www.jeffraflik.com/photos.htm
0 Comments | Post Feedback |
|
Winter Pleasures: Corresponding via Snail Mail
Sunday, January 16, 2011
Now that the holidays have passed, things have slowed down here on My Little Farm in Town, and I’ve been catching up on correspondence. A number of friends and family have responded to the letters I enclosed in Christmas cards and during this cold weather is a great time to write.
Sadly, more and more people seem to be abandoning the fine art of letter writing. I tend to blog on one day and answer correspondence on the opposing day. (I’m really writing letters both days because to me blogging is just writing letters to a bunch of folks I don’t know really well yet!) I enjoy getting letters in the mail—I consider them small 44-cent gifts!
I started corresponding when I was in third grade with a friend of mine who is a Catholic priest. Once a month, he was the guest instructor of our Catechism class and would tell us Sherlock Holmes stories when Sister Bernadette left the room! I still write to him a couple times a year. He has since retired to his home seminary in India and is in his late 80s and still teaching English literature! (He is a scholar of Chaucer. When he heard that I was studying Chaucer in college, he quizzed me in Middle English for a couple of letters. I’m afraid I must have disappointed him. God Bless him!)
Over the years I’ve kept in touch via letters with family; friends from grade school, high school, and college; and Pen Friends in other parts of the world. I write regularly to ten people and less frequently to eight others. Most people seem to enjoy my letters. Some of them have been writing back for over 30 years. Here are a few pointers for writing a good letter:
-
Always keep who you are writing to in mind. If they don’t care about chickens but love to read, write about the books you are reading right now and skip the chicks!
-
Ask specific questions about the life of the person you are writing to and remember the answers.
-
Answer questions that are asked of you thoughtfully. Refer to the letter you are answering so that you don’t miss any questions asked of you.
-
Enclosures add fun and interest. Stickers, postcards, brochures, newspaper clippings, photos, bookmarks, coasters, tea bags, perfume samples, magnets, book plates, magazine articles, fabric swatches, and seeds are all things that I have sent or received in letters.
-
Write about everyday things as well as special events in enough detail that the person you are sharing with can experience them again with you. What is a common event to you may be a novelty to the person you are writing to. It also gives them a snapshot of your daily life.
-
Don’t brag about your kids or your pets too much. Some pride is natural—too much is tiring.
-
Share your feelings. Confidences build intimacy and give the other person permission to share more of themselves with you. This give and take is important for building and maintaining friendships.
-
Be patient and faithful. During different seasons of life people write more or less often because of illness, hardship, or crazy busyness. Don’t be a bean counter. Sometimes you will write more than you receive, but it usually evens out.
Next time you get a real letter rather than an e-mail from friend or family, treat it like the gift that it is. Sit down with pen and paper and return the honor. Begonia
0 Comments | Post Feedback |
|
Frugal Family Fun: An Art Museum Outing
Thursday, January 13, 2011
One of the resolutions we made for the year 2011 was to try to make Sunday afternoons family time. It is January and both property and quarterly income tax time, plus there isn’t much snow and the wind chill is below 0F! What is a frugal (aka just about broke) family to do? Answer: Look around for a free indoor activity that will interest everyone.
If you have a university near you, be sure to check their website for free activities they might have to offer your family. The University of Wisconsin Madison is within easy driving distance of our little farm in town and has a lot to offer. In the summer, there is the Allen Centennial garden, Picnic Point, Indian mounds, Lake Mendota, and there are a couple of museums that are open all year.
The museum we visited this Sunday was the Chazen Museum of Art (http://chazen.wisc.edu/home.htm). It cost us a little under $2.00 to park in a nearby ramp, and it was a short walk to the museum. Admittance was free, and it was open until 6:00 p.m. which made it an easy place to visit on a Sunday afternoon. The featured exhibit was illuminated manuscripts. If we had wanted, we could have stopped here, but we decided to move on into the main galleries.
A note of caution: If you are concerned about your children seeing the undraped human form, you will have to be highly selective in most art museums. Our child is of an age and stage in development that we were comfortable taking her through most of the museum. There was one area of the collection that we decided wasn’t appropriate, and fortunately, it was easily bypassed.
On the way home, we talked about what our favorite art pieces were and why. My favorite painting was big and brilliant and told a dramatic story (http://chazen.wisc.edu/shop/Notecards/00000016_f.jpg ). I also enjoyed the abstract sculpture (http://chazen.wisc.edu/popups/pop.asp?ID=2001-46) . We all thought the illuminated manuscripts would have made the trip worthwhile even if we hadn't viewed any other part of the museum!
I was more than satisfied with our first family outing of the year. I can hardly wait until next week! Begonia
4 Comments | Post Feedback |
|
Scratch Cooking: Slow Cooker Chuck Roast Three Ways
Tuesday, January 11, 2011
I learned this very simple method of preparing inexpensive beef chuck roasts years ago and have embroidered on it since!
Basic Beef Pot Roast with Vegetables
-
2-3 lbs. beef chuck roast trimmed of visible fat (dredged in a little flour salt and pepper and browned in a couple tablespoons of vegetable oil—or not—your choice)
-
1 envelope dry soup mix (Lipton, Knorr, or store brand onion, leek, or vegetable) or you can make your own by combining 2 tablespoons of beef broth powder with 3 tablespoons dried vegetables or minced dried onions.
-
I medium onion sliced and separated into rings
-
Three medium carrots and potatoes cut into equal-size pieces.
Place the onion rings in the bottom of a medium sized slow cooker and top with meat and sprinkle all with dry soup mix. Top with carrots and potatoes. Put lid on pot and cook on low for 6-8 hours. When done, meat falling apart and vegetables soft. Remove meat, potatoes, and carrots and keep warm. Use one of the methods of making gravy from my December 16 blog “Scratch Cooking: Good Gravy.”
Beef Burrito Filling
Follow each of the steps for making pot roast except add
-
1 tablespoon of chili powder
-
½ teaspoon ground cumin
-
¼ teaspoon garlic powder
-
1 small can of chopped green chilies or sliced Jalepeños
-
If you like some heat and a smoky flavor, add a few chopped ancho chiles in adobo sauce.
-
Omit the carrots and potatoes.
Remove meat from crock pot and chop or shred with a couple of forks, removing any bone, gristle, or visible fat. Return shredded/chopped meat to slow cooker and mix with juices and soft vegetables. Serve with warm tortillas with sides of sour cream, salsa, shredded lettuce, and diced fresh tomatoes.
Italian Beef Sandwich Filling
Follow each of the steps for making pot roast except add
-
½ to ¾ cup chopped green bell pepper
-
1/4 teaspoon garlic powder
-
1 and ½ teaspoons dried oregano
-
1 teaspoon dried basil
Omit the carrots and potatoes.
Remove meat from crock pot and chop or shred with a couple of forks, removing any bone, gristle, or visible fat. Return shredded/chopped meat to slow cooker and mix with juices and soft vegetables. Serve on hamburger buns or dinner rolls and topped with chopped yellow peperoncini peppers.
These are all excellent recipes for a quick meal when you get home from a busy day. The pot roast is a one-pot meal; just set the table. Serve the burritos with rice and refried beans. The Italian beef only requires a green salad to a make a balanced meal. Enjoy! Begonia
Images:
0 Comments | Post Feedback |
|
Snowshoeing in Donald Park, Dane County, Wisconsin
Sunday, January 09, 2011
I have a friend that I hike with. We pick a different county or state park to visit each time we get together and spend two or three hours exploring the trails. In the warmer months, we take our trekking poles and explore the different trails. In the cold snowy months, we do our hiking on snowshoes and cut the brush, sometimes we even use the trails!
Yesterday was pretty warm—in the 30s F. We knew it was going to warm into a January thaw in the next 48 hours, so we took advantage of the last bit of warm weather with a little sun and decent snow to visit Donald Park.
We parked in the small public fishing grounds lot and slipped into our snowshoes. Then we skirted the creek and crossed it at a shallow, snow covered spot and followed the rock formations around into a wide prairie area bordered by rolling, forest-covered hills. We could hear the call of a Great Horned owl way back on the ridge where the park borders private land. It was unusual to hear one in the afternoon. They are big owls with big voices, and you could hear this one echoing through the entire valley.
Our goal was a special “boiling” spring on the opposite end of the 600+ acre park. The trails were well used this year because the park is gradually becoming more well-known. We saw tracks of skis, snowshoes, walkers, and dogs, as well as the footprints of mice and rabbits and hawk and owl pellets of fur and bones.
We walked on a trail bordering the trout stream that runs through one quadrant of the park. The active corps of volunteers has been working for years clearing brush along it, and now we could see it clearly as we walked: the small river of open water rushing on one side of us and the rising upland of restored oak savannah above us.
Finally, we entered the woods again. Still with the trout stream on our left, we passed the now-shrouded and snow drifted excavation of an early settler’s cabin. The park is made up of donated farm land, so there are a number of cabin foundations in it. (This site has been under excavation for several seasons and continues to be a golden opportunity for any volunteer wanting to participate in a dig.) The trail we were traveling had once been a stage coach road that literally passed at the doorstep of this cabin.
The final trail to the springs snaked through the woods and on, but we stopped at the small observation deck overlooking the springs and climbed up to get a better view of the open pool of water below. It is not a hot spring. It gets its name because of the way the spring water rises from the floor of the pool, bubbling up and disturbing the surface in perfect rings like boiling water in a shallow pan.
There is something mesmerizing about liquid water after every bit of outdoor moisture has been frozen solid for a couple of months. I can stand and watch that bubbling water (it seems like) forever. I can understand why this was considered a sacred place by the tribes that moved through this area in earlier times. The water is so clear that you can see the sand “smoking” as the fresh water pushes up through it. The 10-inch fish swimming around in it and the logs and branches on the bottom look close enough to touch, but I know the water is at least 3 or 4 feet deep. You can even see the springs rising in the river channel where the pool and stream meet. The water stays open here most of the winter, so I’m looking forward to hiking back in later in the month to share a few liquid moments with my family. Begonia
0 Comments | Post Feedback |
|
Greeting Card Bookmarks
Thursday, January 06, 2011
After the holidays, I am left contemplating a stack of beautiful cards that are too pretty to throw away. In the past, I’ve made them into gift tags, but there’s a limit to how many of those I can use per year. I’ve also given a lot of cards to a friend who converts them into pretty wall decorations with scripture verses and sends them to missionaries as gifts for the people they are serving.
Bookmarks are one thing that I never seem to have enough of. (At any given time, I will be reading five or six books.) I also like to give books as gifts and will often include a bookmark. I correspond via snail mail with a number of people as well and have found that bookmarks make nice tokens of esteem and liven up a letter. While traveling last summer, I bought photo bookmarks of that section of the Mississippi River in lieu of post cards (although postcards also make good bookmarks for bigger books)!
Making cards into bookmarks is simple.
1. If the back of the card is written on heavily, cut it off and retain the front, reinforcing it with white pasteboard or cardstock from another source. (I save stiff white cardboard packaging material rather than throwing it away or recycling it so I can reuse it to make bookmarks.) If the back of the card is not written on, simply glue the card shut and trim to the desired width. Sometimes I will fold the front of the card over and glue the halves together to stiffen it.
2. I use glue stick for most of my projects because it goes on relatively dry, and I make sure to apply the glue all the way to the edges so they don’t separate later. You could also use white tacky glue and spread a thin layer with a small paint brush.
3. One card can sometimes be made into several bookmarks, depending on its size and design. I usually trim off the greeting, unless it suits my purpose, and any excess cardstock to make a nicely proportioned finished product.
4. Finally, I punch a hole in the top of the card with a die cutter or hole punch and attach a ribbon or cord. Beads can be threaded onto the cord or ribbon to make the bookmark even more attractive.
Try making bookmarks out of birthday and anniversary cards you’ve saved because they were too pretty to discard (Sorry, I couldn’t resist!) or recycle. Even pretty product packaging can be made into attractive bookmarks. (I’ve even made bookmarks out of the printed linings of envelopes!) Have fun. Begonia
Images:
0 Comments | Post Feedback |
|
Baking: Peanut Butter Blossoms
Monday, January 03, 2011
Cookies, Cookies, Cookies! I made Peanut Butter Blossoms today. The house is full of the smell of chocolate and peanut butter as I write this. The recipe and how-to follows:
http://www.hersheys.com/recipes/5191/Peanut%20Butter%20Blossoms.aspx
I’ve been enjoying my oven and the extra time that I now have after the dust has settled on the holidays. My husband installed the oven in time for the absolutely necessary (to me) baking for Christmas events, such as 4-H caroling, gift wrapping, and game day at the local retirement community and toasting the crostini that always go with the Sundried Tomato tapenade that we bring to the Christmas Eve get together with my husband’s side of the family. There was no leisure to do the baking that I really enjoy.
It all started with my Betty Crocker Easy Bake oven back in the 1970s. I chose it from among many other possibilities out of the Sears catalog that year. There were a lot of us at 321 Pine Avenue, so it was easier for our parents to supply us with the Sears catalog and its extensive toy section and ask for a list for Santa rather than trying to surprise all nine of us!
Back then, the Easy Bake ovens looked like real miniature ranges and had 100-watt light bulbs inside that really baked food!
http://www.youtube.com/watch?v=VpFjQoWMUoU&playnext=1&list=PLF986481B00B143B3&index=30
This oven came with some mixes and a real recipe book, so that a kid could be a scratch cook right from the start. Teacakes are still my favorite cookie. They were the first thing I baked in my Easy Bake Oven! Many years later, I bought my daughter her first easy bake oven hoping to recreate for her my experiences as a kid. It looked like a microwave—please! It never cooked worth a darn. She much preferred the real oven and real recipes (all my daughter's version of the Easy Bake came with were instruction for making mixes).
I sold my Easy Bake Oven at a flea market when I was a teen in need of some cash. We were never given allowances—times were too hard. I regret selling it to this day. Maybe one of these days I’ll find another one at a garage sale for a good price. (The ones I’ve found on the internet are more expensive than my new (to me) wall oven!) Begonia
Images:
0 Comments | Post Feedback |
|
A Sewing Day
Sunday, January 02, 2011
It was a lovely bright day here on My Little Farm in Town. The sun was shining and actually felt warm! My daughter and I spent the rest of the day sewing with a friend.
My friend is an excellent seamstress. I provided the fabric from my stash and she helped us make sense out of the diagrams and directions! She came in the morning and stayed until the sun went down.
We started out by chatting and looking through some books on making tote bags and purses that I had gotten from the library and picked up at my favorite library book sale. We settled on patterns from two books: The Total Tote Bag Book: Designer Totes to Craft and Carry by Joyce Aiken and Jean Ray Laury, Taplinger Publishing Co., New York, 1977; and Making Handbags: Retro, Chic, Luxurious by Ellen Goldstein-Lynch, Sarah Mullins, and Nicole Malone, Rockport Publishers, Gloucester, Mass., 2002.
We moved to the family room and combed through my extensive stash of fabric. I find fabric at garage sales throughout the season for as little as 75 cents per yard or less—April through November. Some of my fabric came from friends who were sharing large windfalls of material from quilters. I never turn down or pass up fabric, crafting materials, or art supplies because my daughter is very creative. If she doesn’t use the items now, they will be there when she is ready for them!
After a break to collect eggs and eat lunch, we started cutting and sewing. I’m not a great seamstress. (I once made a pair of shorts with one leg!) I just decided to jump in there and sew something myself. I’ve been watching my daughter sew her 4-H projects for a couple of years now, as well as lining up expert help to get her over the rough spots (such as a assistance with a plaid six-panel skirt for a season’s barter of fresh eggs).
In the midst of all this frantic creativity, I got some strawberries out of the freezer and made shortcake.
We ended the day with two completed tote bags and one still under construction. We invited my friend’s husband over to ruin his supper by eating dessert and drinking strong coffee with us first. It was a nice way to break up the tedium of winter by doing something different and creative with a dear friend.
Can you think of some activity you can share with a friend? Try something new! Begonia
0 Comments | Post Feedback |
|
Wire Wrap Jewelry Rescue
Thursday, December 30, 2010
A friend of mine in England sent me a lovely Christmas present this year. The only problem was that it had a bit of a rough passage and arrived in a number of pieces.
I read the customs declaration sticker and (thought) it said “Seeds.” I shook the package next to my ear, heard it rattle, and smiled. I decided to open it before Christmas because I just couldn’t wait, and my friend had already e-mailed and asked if the package had arrived! Imagine my surprise when I found that the package contained an art glass pendant and matching earrings in a number of jingling chunks. I took another look at the label and realized it actually said “Beads.” (Don’t ask me how I managed to read it wrong; S--- your handwriting is fine.)
I sat in my recliner with my handful of attractive but broken glass and couldn’t bear to throw it away. Then I thought of my daughter who had made many wire wrapped pendants from beads and smooth hunks of semiprecious stone as Christmas presents for relatives. I asked her if she could do anything with the larger pieces of glass and she said, “Sure!” and spent a few hours making a long necklace out of the glass shards after smoothing the edges on a wet stone. It turned out to be a beautiful and reversible piece of jewelry. (The back of the glass is green.)
I love my new necklace and it is doubly special because of the friend who sent it and the daughter who refashioned it! Begonia
Images:
2 Comments | Post Feedback |
|
Frugal Family Fun: Christmas Road Trip Basket
Tuesday, December 28, 2010
When we go to see the bald eagles in January and February or when doing Christmas outings, we’ve found that it saves money to bring your own treats. Most frugal people bring snacks with them when they travel or go on outings, but we like to make it a bit more special.
I brought a special refreshment basket with when we went on our Christmas road trip to the Pabst Mansion in Milwaukee with friends and family. (Read my Dec. 12 blog.) I took a nice big basket with handles and filled it with International Coffees, flavored cocoas, peppermint candies, teas and honey, ceramic Christmas mugs (and plastic spoons!), printed holiday napkins. We also brought along a pump jug of hot water. Sometimes we brew a pot of good strong coffee and bring it in a thermos, too. If a bakery is on the itinerary, I don’t bake. Otherwise, the basket may include cookies or muffins. Whatever the drink or baked good is, it just has to be something that everyone will enjoy.
Sometimes we pull over at an overlook and enjoy the scenery along with the refreshments. Other times, we have a snack as we drive along. In warmer weather, we might stop at a park or wayside.
Try putting together a special basket for your next family outing. It will be a source of good memories for your whole family. Begonia
Images:
0 Comments | Post Feedback |
|
Frugal Family Fun: Christmas Light Tour
Thursday, December 23, 2010
We started doing Christmas light tours when our boys were young. One year there were an exceptional number of people decorating their homes and yards in our little town. The boys were antsy for Christmas to come, and it was Christmas Eve Eve (December 23). We wanted to do something especially “Christmassy,” and it was our last crack at seeing the sights and lights before going out of town for Christmas Eve to visit relatives.
We stopped at McDonalds and bought shakes and then started driving around town and enjoying the decorations on houses. Many people tend to leave the living room drapes open so that anyone going by on the street can admire their Christmas trees. One of the Lutheran churches puts on a live Nativity each year, and we all make a point of driving by to see it and honk the horn and wave.
We all have our favorite areas of town and over the years have worked out a route that takes us to these places and to houses that year after year put out the best and brightest decorations. Our grown children still look forward to getting a shake and taking the tour once again whenever they can make it home for Christmas! Begonia
0 Comments | Post Feedback |
|
Frugal Family Fun: Christmas Movie Nights at Home
Wednesday, December 22, 2010
I was torn between listing this blog under FFF or Holiday Traditions because it is so cheap—I mean Frugal!—and yet it has been a tradition in our family for almost 20 years. Every week we watch a favorite Christmas movie together.
We have gotten these movies as 99 cent rentals from the gas station (now we have Redbox), borrowed from the library, or been loaned them by friends. As the years went by, I slowly began to acquire our favorites from garage and book sales; as gifts; or as they were retired from movie rental stores.
The first movie of the holiday season is always Ernest Saves Christmas. We watch it as we decorate the family tree in the family room. (It is also one of the best Ernest movies.) A Christmas Story makes me want to cover my living room coffee table with tidbits filled with cookies and fudge, eat sweets, and stare at the Christmas tree. (My living room tree is decorated with 30s, 40s, and 50s decorations, glass bead garland, and bubble lights.) It inspires me to bake and make candy!
I have a basket devoted to the Christmas film and TV genre filled to overflowing with our collection:
Some are old favorites: The Bishop’s Wife (with Cary Grant at his most handsome AND David Niven); Holiday Inn and its sequel White Christmas; Little Women (the 1949 and the 1994 versions); Miracle on 34th Street (with Maureen O’Hara and Natalie Wood); It’s a Wonderful Life; A Christmas Carol (with Alistair Sims); and Little Lord Fauntleroy (with Freddie Bartholomew) a story that includes Christmas—OK, I’ll admit that I watch it mostly because I just love Freddie.
Others are children’s classics that I grew up with: Rudolph the Red Nose Reindeer, Frosty the Snowman I and II, A Charlie Brown Christmas, and Dr. Seuss’ How the Grinch Stole Christmas. These were shows that were shown on television once a year when I was a kid and I never missed them. I watched for commercials advertising their coming and made sure I had dibs on the TV (most households only had one on our block) set for the time they would be on. We all knew we had only one chance a year to watch them, and it was serious holiday business, indeed! My boys came along during the era of VHS. Their favorites are also in the basket and include The Muppet Christmas Carol, and Muppet Family Christmas.
Some of the best my best Christmas memories are attached to Chicagoland children’s shows that only broadcasted certain shorts during the holiday season:
http://www.youtube.com/watch?v=xaUBpsn4QjQ&feature=related Here Comes Suzie Snowflake
http://www.youtube.com/watch?v=JDM6Bbt9WDY&NR=1 Hardrock and Coco and Joe
http://www.youtube.com/watch?v=TU3SKtJbNu8&feature=related Frosty the Snowman
(I don’t have these in my collection yet, but I’m working on it—for now they can be viewed on Youtube!)
Others were TV episodes I have recorded or on VHS: Little House on the Prairie: The Christmas They Never Forgot, Thomas the Tank Engine and Friends: Thomas’ Christmas Party and Other Favorite Stories, The Twilight Zone: Night of the Meek, Red Green Christmas Specials, and Burt Wolf’s Christmas at the Biltmore.
We do have a few newer movies in the collection (and it continues to grow) like The Polar Express and Family Man, which is a favorite of my husband’s (sort of a combined remake of It’s a Wonderful Life and Groundhog Day with less humor and a harder edge.) I’d like to add the most recent A Christmas Carol to our collection soon. (It is the most like the book, thanks to modern animation, if you overlook the crazy, way-too-long Disneyesque hearse chase, which I will click through when I watch it). Take Peace: A Corgi Cottage Christmas with Tasha Tudor is my favorite recently produced Christmas classic. (I am slowly collecting all of Tasha’s Christmas books as well. She illustrated The Night Before Christmas at least four times—they are delightful, and I love her cats and owls.)
No Christmas season would be complete without at least one viewing of Santa Claus Conquers the Martians! I found my copy in a giant cardboard discount bin at a big box computer store some years ago. I love how they spray painted and glued together scuba gear and old football helmets (worn backward) to create the Martians’ headgear. The DVD also features a collection of really dreadful shorts that I skip over to watch the1950s and 1960s toy commercials interspersed throughout the disc.
If you don’t already have this holiday tradition at your house, make some popcorn, dim the lights, and watch a favorite Christmas movie together tonight and start a new family tradition. Begonia
Images:
0 Comments | Post Feedback |
|
Christmas Traditions: Gingerbread Houses
Wednesday, December 22, 2010
As a family we try to do seasonal things together that don’t cost a lot of money. That way we can do them each year whether the economy (or cash flow) is good or bad and continue to build a store of good memories in ourselves and our children.
One of the things we started doing a few years ago was to visit the historic District One School House in our town to view the entries in the annual gingerbread house contest. This activity costs us $1 per person and then we go out for a treat afterward and do a little Christmas shopping downtown.
Entries fall into several categories. For the entry fee, you can vote for your favorite. There is a silent auction of Christmas items from local merchants, and a special money gingerbread house is raffled off to raise funds for restoration of the school. Children can decorate a gingerbread cookie to take home or eat right there, and Christmas cookies are for sale as well.
We enjoy discussing the relative merits of the entries and seeing who won the rosettes each year. We also like to see the progress that has been made in restoring the building. Some years we walk downtown and back and others like this year, when the wind chill was 0°F and below, we drive even though it is only a half mile walk.
Perhaps you have something like this in your town. Feel free to comment and add your pictures to mine. The more the merrier, especially at Christmas time! Begonia
Images:
0 Comments | Post Feedback |
|
Holiday Traditions: A Visit to the Wisconsin State Capitol Christmas tree
Tuesday, December 21, 2010
Every family has holiday traditions. Our traditions include a yearly visit to the state capitol to see the Christmas tree erected in the rotunda. (It always seems like the coldest day as we walk up the windy street to the capitol after parking and feeding the meter!) The tree is always huge and beautifully decorated! They have to bundle it very tightly to get it through the entrance doors, and sometimes they break it in the process and have to mend it a little before they can decorate it!
This year’s tree was, as usual, huge and beautifully decorated with ornaments made by the state’s school children. One year we came early in the month and caught them decorating the tree. They already had most of the lights on and were in the process of putting on the thousands of handmade ornaments. The tree was ringed with scaffolding and the train wasn’t set up yet.
On the years when we viewed the tree on a weekend, there has always been some kind of musical event in progress. One year it was carolers and brass quintets. Another year it was a huge gathering of tuba players (over 70!) all playing Christmas carols at an impossibly low register. (I plugged my ears to better hear the melody!) They and their instruments were decorated with stuffed reindeer antlers, shiny noses, and lights. This year a couple was getting married and a lone violinist was playing, among other classical pieces, Pachelbel’s Cannon in D.
The interior of the rotunda where the tree is displayed is dimly lit, so the impact of the multicolored LED lights covering the tree when approaching via the long entrance hall is rich and startling. (Sorry, my pictures don't do it justice.) The base of the tree has a train running around it. People’s voices echo as they talk to each other and their children, but it is never too difficult to hear the music, and there is always the low whirring sound of the large train circling the tree. The children are fascinated by the train and the size of the tree. I always like to study the ornaments. It is obvious that kids of all ages have made them. I hope some of their parents brought them in to see their creations displayed on this great tree. Begonia
Images:
0 Comments | Post Feedback |
|
Scratch Cooking: Good Gravy!
Thursday, December 16, 2010
So you’ve roasted that chicken or cooked that chuck roast in the slow cooker, now what do you do with those thin drippings and juices? You have two choices: Freeze and save them for your next pot of soup or make gravy tonight!
The easiest way to make gravy is by simply thickening those juices. The easiest was to thicken them is with cornstarch. When I have a guest who is gluten intolerant, especially, this is how I make gravy:
1. Stir together two tablespoons of cornstarch and ½ cup cold water. (The water must be cool or the cornstarch will clump into distressing little balls and not mix properly.)
2. Transfer the juices from the crockpot or roasting pan into a sauce pan. Skim the fat from the top leaving mostly drippings. Add broth if you don’t have at least two cups of drippings. (The broth can be made from a bouillon cube or powder added to warms or hot water.)
3. Add a third of the cornstarch solution (stir it up before adding) to the drippings. Turn up heat to bring mixture to a simmering boil stirring constantly.
4. Continue to stir as the mixture turns from milky looking to clear and thickening.
5. Continue to add cornstarch solution while stirring constantly until the gravy is as thick as you like it. If it gets too thick, thin it with a little water or broth.
6. You may want to add salt and pepper to taste or maybe some herbs depending on the type of meat. I use sage and parsley for chicken and thyme for beef.
I also use this method to make stir-fry sauce. When all the meat and vegetables are cooked, I push them to the sides of the pot and pour a cold mixture of broth, soy sauce, and cornstarch into the center of the pan and stir until it boils and thickens. Then I take it off the heat and stir to combine the sauce with all the other ingredients in the pot and serve over hot rice.
The other common way to make (medium) gravy is with two tablespoons fat and two tablespoons flour per cup of liquid:
1. Melt two tablespoons of fat (skimmed beef or poultry fat or margarine or butter or some combination of the two) in a sauce pan over low heat.
2. Sprinkle two tablespoons of all-purpose flour over fat, then stir or whisk continuously over medium heat until mixture is smooth and bubbly.
3. Take off heat and add cup of liquid (in this case, drippings, broth, bouillon or some combination of these liquids). Return to heat and bring mixture to a boil stirring or whisking continuously until thickened.
4. You can add a little more liquid if the gravy is too thick, or add some cornstarch solution if it is too thin for your taste. (If you measure the flour and fat carefully, you shouldn’t need to do either of these things.)
5. Add salt and pepper to taste or herbs depending on the type of meat drippings used.
A medium white sauce is basically medium gravy as shown above only you use butter or margarine rather than animal fat and use milk for all or part of the liquid. Add grated cheese at the end, and you have a cheese sauce. Add crumbled breakfast sausage or chorizo sausage, and you have biscuit and gravy sauce for breakfast. Add chipped beef, chicken, turkey, tuna, or salmon and some vegetables and herbs, and serve over toast or baking powder biscuits, and you have a lunch or dinner entrée.
-
For heavier white sauce, add more flour and fat per cup of liquid: ¼ cup flour and ¼ cup fat to 1 cup liquid.
-
For lighter white sauce, add less flour and fat per cup of liquid: one tablespoon flour and one tablespoon of fat to 1 cup liquid.
Cream soups and chowders can start from a light or medium white sauce base that is thinned to taste with more milk or broth. The cream soup made from such bases can be substituted in casseroles for canned cream soups. This can add up to quite a savings on the food bill over time if your family eats a lot of casseroles, soups, and chowders.
This last method of making gravy I discovered when cooking a nice lean pork loin roast on a bed of sautéed leeks in a covered Dutch oven. By the time the roast was finished, the leeks were pretty much mush. The pureed leeks and pan drippings with some added salt and pepper became the gravy! The pureed leeks thickened the juices wonderfully and made excellent (and in this case, low-fat and gluten-free) gravy. I have since used this method in other meat recipes where vegetables were cooked until very soft (as when you pressure cook or use a slow cooker to prepare a pork or beef roast). An electric stick hand mixer is very handy for pureeing in the cooking pan so you don’t have to use a food processor.
Now you are all set to make gravy, soup, stir-fry sauce, casserole, soup, chowder, or biscuits and gravy! Hope this helps you make some great meals and save money on your next trip to the grocery store. Begonia
0 Comments | Post Feedback |
|
New (to me) Oven Just in Time for Christmas!
Tuesday, December 14, 2010
That gaping hole in my kitchen wall is now partially filled with a new (to me) oven! Well, it is actually a gaping hole in my kitchen and living room walls. My husband had to widen the opening by 5 inches to accept the bigger, newer oven and in the process had to remove paneling and move the living room portion of the wall by 5 inches as well. Nothing is ever simple.
I had found the oven about 3 years ago at a rummage sale in the parking lot of the Zwingli UCC. The oven was five years young and just about clean as a whistle. It cost me $25, and guess what? It works just fine and is self-cleaning to boot!
My old wall oven lost the victory about six months ago. We could have bought another heating element for $35, but why throw good money after bad when we had a perfectly good oven sitting at the bottom of the basement stairs? The old oven was at least 40 years old and 50 degrees off. My “new” oven preheats promptly and heats to whatever temperature I set it.
I used a wide array of small appliances to fill the gap while I waited for my new oven to be installed: crockpots, rotisserie, pressure cooker, bread machine, big Nesco cooker, and microwave oven and, of course, the outdoor grills! It only got tiresome when the cold fall weather hit, and I found myself planning meals and grocery shopping only to remember at the last minute that I didn’t have an oven!
The new oven was worth the wait. (I had urged my husband to finish the bathroom remodel before starting a new project.) Now I have a nice new bathroom/laundry room AND a new oven! Can’t wait to start baking Christmas cookies! Begonia
Images:
0 Comments | Post Feedback |
|
Christmas Day Trips: Wisconsin Governor's Mansion and the Pabst Mansion
Sunday, December 12, 2010
We went to a couple of festive places this past week. The first was the Wisconsin Governor’s Mansion on Lake Monona, and the other was the Pabst Mansion in Milwaukee.
My daughter and a good friend were the first people through the holiday display at the Governor’s mansion. (http://jessicadoyle.wi.gov/section.asp?linkid=440&locid=71) It was a bright freezing day in the teens Fahrenheit, and we walked briskly up to the front door as soon as the gate was opened. I pulled the door open, stuck my head in, and asked if we could come in because it was freezing outside!
The governor’s mansion was conservatively decorated. There was a tree in the dining room with ornaments from each county and another in the room next to it where the state’s First Lady Jessica Doyle was shaking hands. I was a bit surprised to be at the head of the receiving line—the poor woman had to introduce herself! There were a couple of trees in the living room area covered with Wisconsin products ornaments , another In the den/library, and then one in a sun room on the way out with ornaments representing nonprofit groups. It was a nice bright house, and it really felt like a family home in an upscale residential neighborhood with some extra big public rooms for entertaining.
There were nice lake views from every room on that side of the house. I saw geese, ducks, and a pair of big white swans feeding in the water. It could have been any wealthy person’s home on a nice lakeside, estate-size lot. (I can’t believe the incoming Governor is talking about selling it! Where are we going to entertain visitors to our state—in a well-insulated Morton pole shed or some tacky hotel banquet room?)
I’m a museum and historical site nut. The Pabst Mansion was grand! (http://www.pabstmansion.com/) This is one mansion I’ve always wanted to visit during the Christmas season. They had the music room filled with a collection of nutcrackers, and there were Christmas trees decorated like the family had enjoyed them during the early part of the twentieth century—totally covered with tinsel and old ornaments. One of the upstairs bedrooms had one of the neatest doll houses I’ve seen, complete with an attic full of bedsprings and trunks and a cellar with a boiler room and an old guy cracking crabs on newspaper for dinner! It had been the bedroom of a granddaughter they adopted and raised.
The Pabst family had the mansion built in the Flemish Renaissance Revival style. Capt. Frederick Pabst only lived there for four or five years before his death in 1904. The family sold the mansion in 1908 to the archdiocese of Milwaukee. The new owners painted most of the wood and fancy plastered ceilings above the first floor WHITE. They did leave the woodwork on the main floor alone, and the original colors and fixtures are still in place on the upper floors, though under several layers of paint. The upper floors are not totally renovated because a lot of the donations and grant money have been put into conserving the foundation and exterior of the building. The main floor rooms and the stairwells and the main hall on the second floor are all finished, and the master suite is the next area in line for attention.
One of the best things about the house was the guy who had it built: Capt. Frederick Pabst. You can judge rich people by how well they treat the servants. The servant dining room and butler’s pantry were much nicer than even than those I’ve seen in a Vanderbilt mansion. Frederick Pabst was by all accounts a really decent, generous, and kind human being. What greater legacy can we leave behind than a good name and reputation? Begonia
Images:
0 Comments | Post Feedback |
|
Thrifty Christmas: Christmas Greetings
Wednesday, December 08, 2010
I’ve been sending out handwritten Christmas cards since I was in grade school. I bought my cards through Current, Inc., because the price went down if you could get a big enough order. At that time, they had a wide variety of really lovely stationary and note cards. I used to send postcards because both the cost of the cards and the postage were lower (this is still true).
I send out 38 or 40 cards a year, and I keep track of who I receive cards from as well as who I am sending cards to. My Lang address book has a Christmas card record. Hallmark address books also have had them in the past. For years, I have used five-year Christmas card record books put out by Current. I keep my Christmas card record next to my address book all year so that I can keep them both update.( I will start using my new Lang address book for that purpose next year and that will eliminate the repetition!) If I don’t get a card, letter, e-mail, or telephone call from a person on my card list for two holiday seasons in succession, I don’t send out a card the following year unless they are elderly, sick, or family. It sounds Grinchy, but it keeps costs down and the number of cards I send out manageable.
I like to enclose a handwritten note or letter with each card. I start on cards right after Thanksgiving. If I can personally wish someone a Merry Christmas, I don’t send a card. I make some time to greet them in person. My husband and I keep our cards separate. He already had an extensive Christmas card list when I married him. I have met but don’t have a personal relationship with most of the people on his list. He likes to send a yearly Christmas letter, which I help him with by addressing envelopes and keeping track of his list along with mine.
I found half of this year’s Christmas cards (20) at the St. Vincent DePaul thrift store for $1.70. They have a vintage Christmas sale every year in November at their westside Madison location. I used to wait in line for it until they started raising their prices and selling off the best stuff on eBay! (Times are hard, and I don’t blame them for trying to make the most money for charity—but I do miss the great stuff I used to find there!) Since they start the sale midweek, I usually go in at some point on the first day, and there is still plenty to pick through.
I also pick up a lot of my cards (stickers and note paper) at garage sales during the summer. I run across whole boxes of cards at garage sales for 25 and 50 cents each! Most people don’t like to send out the same card two years in a row (or ever!), which means there are always beautiful cards to pick up for very little. (The same holds true for wrapping paper and gift bags!) I hold my odds-and- ends cards for three or four years and then use them again. Most people don’t remember the design of the card they sent out three years ago much less the one I sent out!
I donated a bunch of cards I’d found at garage sales to my church for their Christmas Basket kindness this year. (They weren’t spreading any Christmas cheer sitting in a box in my basement!) Then there are the freebie cards, address labels, gift tags, stickers, and note paper that come unsolicited in the mail. It pays to open some of your junk mail! Begonia
Images:
0 Comments | Post Feedback |
|
On Self-Sufficiency: Hubbard vs. Hayes
Sunday, December 05, 2010
One of my hobbies is reading autobiographies, journals, and handbooks on thrift and “self-sufficiency.” I was reading Payne Hollow Journal by Harlan Hubbard last night and something about the guy bothered me. He wrote about all the various tasks of “simple living” in tune with the seasons and the land: gathering and chopping wood, gardening and gleaning, animal husbandry, and painting and observing nature, with some musical evenings and infrequent trips to town for minor shopping and cultural events. Sounds nice doesn’t it?
He also related how he was really out of sorts before and after a visit of any length to another’s home or anyone’s visit to his home. He mused on how he was able to act cordial until the second either he or they were out the door and then he was back to his previous grumpy mood.
I couldn’t pinpoint what was bothering me—depressing me really—about Hubbard’s worldview. That was until I started reading Radical Homemakers by Shannon Hayes. To paraphrase her description of a Radical Homemaker, all “radical homemakers” were able to do a lot of things that enabled them to live on one income and save money by not needing it, but none of them could, or tried, to do everything.
Although Mr. Hubbard’s prose was wonderful, his outlook was too self-sufficient. He observed the natural world as interconnected, but he was emotionally disconnected from the greater world around him, which included people (with the exception of his wife) and just about anything that happened in town! The key things that the Radical Homemakers had in common, besides all being great cooks, were their ability to connect with each other. They were interdependent. They all valued and nurtured community and relationships. They helped each other and learned from each other, and it made their lives richer and more satisfying.
Last year, a friend of mine found a good deal on beef, and we bought a side of beef together. This week, my neighbor gave me two shopping bags of vegetables she didn’t want from her winter vegetable share from a local CSA. Last night, I made a big pot of beef vegetable soup for my family. That pot of soup that fed my family was really a group effort with two other families!
Are you doing everything you know how to be thrifty and self-sufficient and still not succeeding? Perhaps you are failing because you are trying to do too much alone! Begonia
2 Comments | Post Feedback |
|
Frosty Chicks: Baby It's Cold Outside!
Friday, December 03, 2010
The temp is due to drop into the single digits tonight and 5 to 7 inches of snow is predicted for Friday night and Saturday, the first major storm of the season. I went out to the coop at sundown and unplugged the heat emitter and plugged in the oil radiator. The heat emitter can only raise the coop temperature 10 degrees, so it isn’t enough when the temps drop into the single digits Fahrenheit. A person with a bigger flock wouldn’t have to worry, but I have only four sadly molting hens in a fair-sized coop, and supplemental heat is necessary.
I’ve had them cooped up for some weeks now. I have opened the pop door on warmer days when the temperature gets in the 40sF, but they tended to come out for short periods and then go back inside to warm up. I run the 250 watt ceramic heat emitting bulb most days and will gradually run it less and less as they get more plumage. By late January, they will be outside on sunny days in the teens when they are fully feathered again!
Inside the coop I’ve been giving them more and more layers of “chicken straw” to spread around the coop floor. It insulates the floor which is quite cold because the coop is up on brick footings to discourage vermin. The oil radiator is up on bricks as well. It has no open flame or heating coil, but it’s never a good idea to have something hot too close to something flammable!
I won’t close up the north side vents until the temperature drops down into the low double digits and single digits consistently. Air circulation is really important in the closed up winter coop because the birds give off so much moisture when they breathe. If the “wet” air doesn’t circulate out of the coop, the birds can become damp. A damp bird is a cold bird, and a cold wet bird becomes a sick bird very quickly.
I’ll also sleep better tonight knowing that my girls are cozy even during a bitterly cold night. You stay warm, too! Begonia
Images:
0 Comments | Post Feedback |
|
Basket of (Mostly) Home Grown Christmas Gifts
Wednesday, December 01, 2010
My mother is not a hard person to give gifts to. She is gracious, appreciative, and undemanding. She is also 86 years old and doesn’t need any more “stuff.” So she is a terribly hard person to buy gifts for nowadays.
This year I decided to give her a gift of stuff that I had grown in the yard, canned during the summer, or that she could watch grow and bloom in the house. I found an amaryllis on sale in a color that she’s never grown before and added it to a big basket I found at a garage sale for $1.
I filled in around the edges with herbs I had dried and packaged in repurposed jam, jelly, and mustard jars from which I’d soaked and scrubbed the labels. These jars have interesting shapes and can be reused or returned to me for refilling! This was a good year for herbs with its abundant rain and warm spells of weather. I harvested and dried a lot of sage, parsley, dill, thyme, and oregano.
My mom enjoys eating hot breakfast cereal, so I got out my trusty little manual grain mill and ground her some farina from wheat I’d bought at our favorite bulk food store. (See my Nov. 24, Grinding Your Own Breakfast Cereal blog.) This cereal is great with some cinnamon added just before serving on a cold December morning.
I did a little bit of jelly making this year: cherry and wild black raspberry. I added a jar of each of those. I also made a couple batches of salsa, so I added a jar of that as well. (I would have canned a lot more tomato products if I could have gotten my hands on some more tomatoes! )
I also did a little drying this year. I included a couple of small jars of dried cherries (a neighbor generously supplied the fruit) and cherry tomatoes. I think those cherries are going to find their way into some hot breakfast cereal pretty soon!
Since my mom loves cats and letter writing, I added a box of Lang stationary packaged in a nice reusable box with a hinged lid. She can use up the stationary and have a practical but pretty storage container for paper clips!
I guess the key to giving the best gifts is thinking about what the recipient really enjoys and how the gift will fit into their life. (I don’t know what my recent request for a rice cooker says about me!) Begonia
Images:
0 Comments | Post Feedback |
|
Tucking in for the Winter
Monday, November 29, 2010
I’ve been tucking in the back (and front) “40s” this past few days (and I have the aching back to prove it)! The weather is going to dip down into the teens Fahrenheit in the next few days, and now is the time to get these final tasks done.
Our small town gives us excellent value for our tax dollar in the areas of street management and yard waste pick up. They are picking up the last loads of brush and leaves today. I left a good size pile of sticks and branches. Our trees are large and mature. They drop a lot of wood into the yard. Most of it I burn in the chimineas, but I didn’t have time for as many fires as I would have liked this year, so my kindling pile is now on the curb along with raspberry canes and lots of willow, which falls continually and is quite a nuisance.
I’ve been covering and uncovering the cold frame daily. Once the temps started falling into the teens, I started banking it with a bale’s worth of straw “slices.” A kind neighbor picked up the bale of straw at the village composting site and gave it to me. People use them for decoration and then discard them. (It would be nice to find a few more—I need to cover my strawberries at some point.)
I carried my lawn chairs, benches, and tables up to the patio and covered most of them with a vinyl tablecloth and stowed my one marble top in the birdseed bin. (Marble weathers badly here if it isn’t protected.) I also put away miscellaneous garden ornaments that I had missed earlier, and my husband stowed away the terra cotta in another outdoor storage area. I don’t think I could squeeze one more thing into the wood box!
The rain barrels have been disconnected from the house and drained. I’ve left one watering can outside so that I can water the cold frame a few times before I pick that last salad!
I also worked on tidying the north side of the house and compost bins. I put another layer on the full one and cleared the other side so that I could add layers of chicken manure and kitchen scraps as the winter progresses. I have a few bags of leaves set aside for that purpose as well. I am going cut back the last of the mums that are now done blooming today and add them to the pile as that first rough layer!
We are supposed to get snow tomorrow. I can watch it fall and the birds feed with a clear mind. That is the wonderful thing about living in a temperate zone. You get a rest from active gardening, and time to reflect on the previous growing season and plan for the next. Begonia
Images:
0 Comments | Post Feedback |
|
Odds and Ends: Don't Throw Away That Carcass!
Friday, November 26, 2010
I probably should have posted this before Thanksgiving, when many people were cooking a whole bird and throwing away one of the best parts! Oh well, you can always redeem yourself with the Christmas turkey.
When preparing your bird for roasting, be sure to save and freeze the neck if you aren’t going to use it right away for broth to make gravy. Set aside the carcass of the turkey, including bones from the drumsticks, wings, and thighs after carving. (Don’t save any bones from parts of the turkey that people have put in their mouths. Cooking with bones that people have slurped all over is both gross and disturbing—even though you will be boiling the bejeebers out of them. That’s my opinion, but it is your call!) I throw away the fat, tail, and skin because I like a leaner broth. (You can put the carcass in a large plastic bag and freeze until you are ready to make broth if you don’t have time to make it the same day.)
Put the carcass and neck into a big pot when you are ready to make broth. Cut into large pieces and add:
-
3 large onions
-
5 or 6 stems of celery
-
2 large carrots
-
6 or more whole peppercorns
-
A generous handful each of parsley and sage
Cover the contents of the pot with one to two inches of water and bring to a boil. Simmer until the carcass falls apart. Add water as needed to cover carcass as it cooks.
Remove most of bones and vegetables with a slotted spoon and pour the broth and what solids remain through a strainer or cheese cloth. I use a wire strainer, but if you want a clear broth, line the strainer with cheese cloth. Throw away the bones and spent vegetables and herbs—all of their goodness is now in the broth and they are pretty much mush.
My broth usually doesn’t have enough fat in it to worry about because I discard the skin, tail, and visible fat while carving the turkey, but sometimes it is necessary to remove fat. You have several options:
-
Chill the broth and scrape the fat off once it rises to the top and solidifies.
-
Skim with a spoon and then drop paper towels onto the surface of the broth to absorb the last of the fat.
-
For small amounts of broth, use a fat separator pitcher to drain broth from underneath the fat that has risen to the surface.
You now have broth to make soup, gravy, or sauce or with which to cook rice, vegetables, or potatoes. You will note that I didn’t add salt when creating the broth because I use it for so many different purposes. (I add differing amounts of salt depending on the dish.)
You can use the broth right away, refrigerate it for a couple of days, or freeze it for months until you need it. I usually freeze my broth in 2-cup and 2-quart batches because these are the most common quantities needed for my favorite recipes.
You can use this method of making broth with chicken and beef, too. There is nothing nicer than the smell and taste of a good bowl of homemade broth in the winter. Begonia
Images:
0 Comments | Post Feedback |
|
Grinding Your Own Breakfast Cereal
Wednesday, November 24, 2010
I picked up a Back to Basics manual grain mill at a garage sale a few years ago that someone had bought as preparation for the year 2000. It was new in the box and cost me $5. I took it home, put it on a shelf in my pantry, and forgot about it.
I remembered the little grain mill while in my favorite bulk food store. I picked up a bag of wheat berries and thought, “I’ve got a grain mill I’ve never tried out!” I bought a bag of wheat, took it home, put it on a shelf in my pantry, and forgot about it!
I was sitting in my recliner with my breakfast coffee and a boring bowl of cold cereal and thought “Wouldn’t a bowl of hot cereal other than oatmeal or Coco Wheats be a nice change? “
And then I remembered! I got the grain mill out, retrieved the bag of wheat from the pantry, and started experimenting.
I found that I could get several grinds from the very simple mill depending on how tightly I screwed down the handle. I can make cracked wheat for bread, a finer grind for farina breakfast cereal, or a border-line coarse flour for whole wheat bread (it took a while to grind enough flour for bread with the little mill).
I’m usually not a fan of plain farina or “Cream of Wheat” hot cereal, but I found that the fresh wheat made a superior product to what I have bought from the grocery store. I added cinnamon to one batch and it smelled and tasted wonderful.
I prepared the cereal by bringing ¾ cup (6 oz.) water with a pinch of salt to a boil and sprinkling three tablespoons of farina into the boiling water while stirring constantly. Then I turned the heat down and continued to stir and cook for one or two minutes until the mixture thickened. I then took the pot off the heat, covered it, and let it sit for a few minutes covered and allowed it to thicken some more. Finally, I transferred the cooked cereal to a warm bowl with brown sugar, a little butter, and milk or half and half.
When properly stored in a cool, dry place, wheat keeps well for a year or more. When it is ground, it has a short shelf life before it begins to go stale (the wheat flour from the store has a stronger taste for this reason) because of the oil in the wheat germ. I freeze what flour or farina I have left over from each grinding for this reason.
If you get really serious about grinding all your own flour, you will probably want to buy a bigger hand or electric mill. For now, I’m just dabbling and will stick with my little one! Begonia
Images:
0 Comments | Post Feedback |
|
Odds and Ends: Celery Ends and Centers
Monday, November 22, 2010
There was a great sale on celery at the grocery store this week. (Celery is in season right now.) I love to shop for food near the Thanksgiving, Christmas, and Easter holidays because there are so many great deals on beef, ham, and turkey and the different vegetables and canned goods that go into preparing the feasts for these holidays.
One of my pet peeves is waste. It is part of the reason that I junk pick, give stuff away, reuse things, and wear things out.
One sore spot for me is our almost criminal waste of our vegetable resources! I’ve watched people cut off and throw away the ends of celery—the part where the stems branch and above. (Yes, Earth Shaking isn’t it?!) The leaves are the best part for making stock and are also good in a green salad. (You can actually grow Cutting Celery that you only use to make stock or dry to make celery flavoring!) The branching stems also can be sliced or chopped and used like any other part of the celery.
The center (that tight little cluster of tender leaves and stems) of the celery stalk, another part I have seen people discard, is the most wonderful part of the whole vegetable. Use it as a garnish, in relish trays, chopped and added to salads, or in any other dish requiring celery.
You may think that I’m crazed for ranting about celery ends and what to do with them, but if I won’t, who will? We all pay too much for food to throw it away. Begonia
Images:
2 Comments | Post Feedback |
|
Eating in Season: Hulless Pumpkin Seeds
Saturday, November 20, 2010
A friend of mine was experimenting with new cultivars and grew pie pumpkins with hulless seeds called Snack Face ( http://www.jungseed.com/dp.asp?pID=03285 ) this year. I'll be trying a few hills of these little beauties in my front yard next season! The seed, indeed, was hulless and very strange looking. I am used to the usual pumpkin seeds with their leathery white hulls. These seeds were a funny black green when raw and a brown green color when boiled, baked, and ready to eat.
I started out by cleaning the pumpkin like any other hard winter squash:
1. Scrub the shell of the pumpkin with a few drops of dishwashing liquid and rinse well.
2. Cut the pumpkin in half with a big knife.
3. Scoop out seeds with a spoon and by combing your fingers through the stringy guts! Discard guts (or compost or feed to your chickens!).
Then I cleaned and cooked the seeds:
1. Place seeds in a colander and rinse, picking out any stray clumps of fibrous “guts.”
2. Dump seed into a sauce pan and cover with a couple inches of water and a tablespoon of salt.
3. Bring to a boil and then simmer for 15 minutes.
4. Dump water and seeds in the colander again—DO NOT rinse—and drain off all excess water.
5. Spread damp seeds evenly in one layer in a shallow baking pan.
6. Bake at 350°F for 30 minutes or until crisp and dry when cooled, stirring every 10 minutes to prevent burning.
The neat thing about this cultivar is that it is also a pie pumpkin. The walls of the pumpkin are thin when compared to other pie varieties, but the flesh is as sweet as a winter squash and a bit less fibrous than a pie pumpkin. Both the seeds and the flesh taste wonderful. (For cooking instructions, see my November 14 blog, Eating in Season: Winter Squash.) If you enjoy growing pumpkins and squash, this would be a good variety to try. Begonia
Images:
0 Comments | Post Feedback |
|
2010 Nightmare Before Christmas: A Family Tradition
Wednesday, November 17, 2010
Every November my side of the family kicks off the holiday season by gathering to share good food, good company, and attractively wrapped atrocities. Other families with warped senses of humor have similar gatherings and call them White Elephant exchanges. We call our party simply—THE NIGHTMARE.
Each year I clean my house and put up several tacky plastic trees which I have come to love dearly (Blog to follow!) My guests arrive, we visit, eat lunch, and then gather in the family room in front of a brightly lit Christmas tree surrounded by sometimes oddly shaped but attractively wrapped Presents of Horror. Each person picks a number, and the presents are chosen and opened in that order. There is no stealing or exchanging of wrapped or unwrapped presents—no one would want to!—just a lot of laughter and expressions of horror and dismay as each ghastly present is revealed. (No off-color gag gifts or regifting from the previous year’s Nightmare is allowed.)
When all gifts have been viewed and the first shock has worn off, the voting begins. The giver of the gift with the most votes for nastiest present of the year wins the grand prize. My eldest sister always donates the prize, which is actually something nice. Then we all share who gave what present, were it was found, its cost, and any story connected to the purchase of each fiendish Violation of the Christmas Spirit.
Our gifts are not simply unique, off beat, or tacky. They are disturbing, horrific, creepy—sometimes even panic inducing. We garage sale and thrift shop each year with the upcoming Nightmare always lurking in the back of our minds. When we run across that perfect gift, there is no hesitation, just an overwhelming urge to purchase at the lowest possible price. One year it may be a creepy chalk clown head (which my Mom stored on a shelf at the bottom of the basement stairs after the party, until she had to get rid of it by popular demand. It was freaking out everyone who went downstairs for potatoes.) Another year it might be a spectacularly tasteless five-foot-long oil-spouting swag lamp with scantily clad nymphs in gold plastic. My favorite was the exquisitely wrought “butt brick,” a hefty hunk of wax molded from the bottom half of an ancient bas relief of the three Graces (Hey, it was Art!).
Some gifts were destined to become bizarre garden ornaments or equally distressing household décor because some small child instantly fell in love with them, such as the famous owl lamp with built in peanut dish (or was it an ash tray?) or this year’s fluffy fun fur owl-on-a -stick. Other gifts are quietly deposited in the first available dumpster.
Each gift has its provenance, such as the stuffed rattle snake I found last year and purchased for the princely sum of $3. It was a gift requested by a five-year-old boy whose parents were going away on an anniversary trip to the Southwest. He wanted them to bring back for him a pair of cowboy boots and a rattle snake. They honored both his requests. The snake now graces the science classroom of a Catholic grade school in Chippewa Falls, Wisconsin. Surprisingly, the rattler did not earn me the grand prize that year—I am still bitter.
The first winner of this nightmare competition was what we called “The Bordello Lamp” with its giant, bulbous, amber-glass base with malfunctioning night light and scarlet shade shaped like a saloon girl’s corset and skirt, complete with dingle-berry trim. It had a commanding presence, standing nearly four and a half feet tall. (It ended up becoming an anonymous cabin warming gift at several hunting camps up north.)
The most recent (and I think most repugnant) winner was a set of cattle hooves made into pillar candle holders. (I actually felt my gorge rise when I got my first good look at them. Gulp!) They looked and smelled vile (that rhymes with bile). My sister caught her Golden Retriever slinking off to bury one of the pair in the woods the week before our get together! The aroma that rose from the wrapped gift had our cat Bert sniffing around under the tree as well.
This is definitely not a holiday tradition for the faint hearted, but even my 87-year-old mother looks forward to it annually (amazing considering that she took home a repulsive, grass-skirt-clad coconut monkey this year). Soon four generations will again begin to taunt each other and drop dark hints about the “gift” that will surely earn them the grand prize next year. Season’s Greetings! Begonia
Images:
2 Comments | Post Feedback |
|
Eating in Season: Frost Salad
Monday, November 15, 2010
We had our first little bit of snow yesterday. I’m not too happy about it because my chickens are molting, and this means keeping them inside with the heat emitter plugged in! When I woke up this morning, everything was covered thickly with frost. The roofs of the houses around us were white. It looked like snow!
One of the first things I noticed were the leaf patterns of frost on the top of my van parked below my window in the driveway. Then I began to think about my greens. I planted kale, garden cress, and maches of three varieties in some of the barrel planters in the front yard. I had read that maches, kale, and garden cress—the maches in particular could freeze, and if left to thaw in place, would be perfectly fine for picking later in the day.
You know what? It’s true.
I just picked a salad that I will serve with supper tonight from my front yard garden and the cold frame—in November after lots of frost and a little snow. (I planted in September.) My goal is to still be harvesting by Christmas. There is a guy in Dubuque, Iowa, who served a fresh salad of greens from his cold frame every Christmas. He was featured in the paper every year we lived there, grinning for the camera and holding open a cold frame filled with greens among the snow drifts.
That is my goal for this year—Christmas Salad from My Little Farm in Town. Begonia
Images:
0 Comments | Post Feedback |
|
Eating in Season: Winter Squash
Sunday, November 14, 2010
I’ve been cooking up all the squash I’ve been accumulating for the last few months. (I ran across a great deal on butternut squash—3 for $1.) I needed the floor space! Winter squash like pumpkins, butternut, and acorn, once field hardened (allowed to dry for a while outside so that their skins become hardened and so resist bruising), can store well for a long time at room temperature with low humidity. Some squash have a longer storage life than others. Pumpkins and butternut squash will keep all winter if their skins are not bruised or broken, while acorn squash must be eaten within a much shorter time or they begin to decay.
The flesh of some squash is finer grained, such as butternut and buttercup, and better for use in pie and casserole recipes. Other squash, such as the spaghetti or acorn squash, have a more fibrous consistency and are best eaten stuffed or with butter and brown sugar right out of their shells.
The easiest way to cook a squash is to bake it, but there are a few things you need to do before you pop it in your oven.
1. Wash the outer shell of the squash with a brush and a few drops of liquid dish soap and rinse well.
2. Cut the squash in half right down the middle with a big knife. I have a special tool that I slip over the knife blade that allows me to bear down on the pointy end of the knife safely. Some squash needs to be cracked open with a chisel or an ax—I use this method with big Hubbard squash.
3. Scoop out the “guts” and seeds. I use an ice cream scoop.
4. Place cavity downward on a shallow greased pan.
Bake in a medium oven (350°F) for 30 minutes or until a fork pushes easily through the shell and flesh.
Allow the squash to cool and then scoop the cooked flesh out of the shell in chunks and pack into freezer containers or bags.
You can use the cooked squash right away or it keeps well in the freezer until you need a pick-me-up later in the winter. Squash are rich in beta carotene and are very good for you! Enjoy. Begonia
Images:
0 Comments | Post Feedback |
|
In the Freezer: Buying Beef in Bulk Directly from the Farmer
Thursday, November 11, 2010
Years ago, a gal who had worked in several small, excellent processing plants in Iowa—where they really know how to cut meat—guided me through the process of buying beef in bulk. Even small meat processing plants in Iowa turn out wonderful cuts of meat. I bought my first beef in this fashion when we lived in Iowa. Iowa is the land of row crops and meat with a capital “M”. Cuts that you find in the special meat case in a Wisconsin grocery store are what you would find in foam trays in the regular meat section of an Iowa grocery store!
Now is the time of the year to buy beef and other meats in bulk directly from the producer. People buy meat this way for many reasons: food safety, a vow to buy local, to support small farmers, economy, or just because it tastes better! It is important to me that my meat comes from one animal and that I know how that animal was raised and who processed it. This has become increasingly important with all the food safety issues that are arising. Buying beef in bulk also is still cheaper than buying beef at the grocery store and allows me to have cuts of meat that I wouldn’t normally buy because the high price.
Basically, this is how it works. You contact a farmer (who has a good reputation and uses a processor with a good reputation) who agrees to sell you beef. The farmer should be able to tell you what the average hanging weight of the meat will be so you have an idea of how many pounds of meat you will be buying. Either he/she or you find enough people to buy the whole animal’s worth of beef. Then the animal is transported to the local processing plant where it is killed, dressed, and the carcass is hung for a week or more before being cut. You pay the farmer the hanging weight of the meat at the current market price or the price agreed upon, which is sometimes higher than market price if it is grass fed or organic. You pay the processor the cost of killing, hanging, and cutting the meat when you pick the meat up.
The farmer should be able to tell you when the animal is going to the processor. You may want to ask the farmer if you can pick what breed of animal you are being sold. A milking breed, Holstein or Jersey, will be leaner and have a higher bone to beef ratio. A crossbreed or pure-bred beef variety will be fatter with a greater fat and meat to bone ratio. (I prefer a beef breed myself.)
The processor should call you when the meat is ready to be cut to find out your preferences as far as different cuts and the thicknesses of steaks and the number of steaks per package, pounds of hamburger per package, and the size of roasts. Some processors will have a checklist of cuts that they will go over with you when they call. Other processors will go with a standard number of cuts that they don’t state and expect you to ask for anything “special.” Be sure to ask questions. There are usually extra charges for making hamburger patties and extra tenderizing. You can also ask for cuts that are not listed, such as brisket, flank, ribs, extra soup bones, suet, heart and other organ meats, tongue, the ox tail, rib and arm roasts, and even dog bones! You paid for most of it as part of the hanging weight—you might as well use it!
There are also things you can ask the processor to do. If you cook with a crockpot, be sure to ask that they cut the roasts so they will fit in a crockpot. Be sure to tell them to give you only the best chuck roasts (there are only so many really decent chuck roasts in an animal) and make the rest into hamburger or stew meat. You can ask that certain cuts be run through the tenderizer twice rather than once (Swiss steak is an example of such a cut). If you are sharing a half, you may need to agree with the person you share with on the thickness the steaks will be cut. (I prefer ¾ inch.) You can also request that your roasts be boneless. Be sure to tell the processor how lean you want your hamburger (I ask for 10% fat—90% lean).
There are also trade-offs. If you order a rib roast, then you are giving up rib eye steaks; if you order a whole loin, then you are giving up fillet mignon steaks; if you order T-bone steaks, then you are giving up New York strip steaks and fillet mignon steaks.
Most producers and processors are honest, but here are some things to watch out for:
-
Keep track of what you order during that telephone conversation with the processor and make sure that you are getting those cuts when you pick up your meat.
-
If the quality and taste of the meat you buy is uneven, don’t go back to that processor. They are probably mixing “boxed beef” and selling the better cuts of the animal you paid for! You usually can’t prove anything, but you don’t have to give them any more of your business. Definitely don’t send anybody else there to be fleeced.
-
A pet peeve of mine is when the processor won’t give me the ox tail. Ox tail makes the best soup and some processors like to keep it and sell it themselves along with the more choice organ meat. I paid for the hanging weight of that ox tail, and by golly, I want it!
-
If all the meat you have ordered tastes gamey, a number of things may have happened. Someone put together your entire order from boxed beef, the processor didn’t scrape the carcass carefully, or the animal was ancient. You have several options: complain to the processor; make a lot chili, taco meat, and barbeque to mask the flavor; don’t go back to that processor or farmer again, or all of the above.
-
If the producer doesn’t conduct business in a timely fashion, let them off the hook and find another farmer to sell you meat.
Once you’ve bought beef directly from the producer, you will never want to buy it from the grocery store again! The quality is superior, the average price per pound is great, and the convenience of “shopping” from your own freezer can’t be beat. Begonia
0 Comments | Post Feedback |
|
Chickens and Winter: Tucking in the Chicks
Monday, November 08, 2010
The temperature is really beginning to dip here on My Little Farm in Town. It is time to get the coop and yard ready for winter.
When the temperature dips below freezing, as it will tonight, the first thing I do is bring the water font from the chicken yard into the garage for the night. Then I plug in the electrically heated water font in the coop. I ordered it from Farm Innovators ( www.farminnovators.com ), and it was one of the best investments I’ve made—besides purchasing the girls themselves! It is not good for chickens to go thirsty at any time because it affects their laying, and I’ve already had my fill of frozen water buckets growing up on a hobby farm with no water hydrant in the barn. (I used to lug five-gallon buckets of water through thigh-deep snow, and it was so cold that when the water slopped onto my legs, it froze before it could soak my long underwear!)
I closed almost all the vents on the south side of the coop and blocked the east and west corner ridge vents with triangles of Styrofoam insulation board. One south vent is always open a little bit. Until the weather gets into the teens Fahrenheit, I won’t close any more vents. I will always have one vent open a little north and south. The chickens’ respiration is moist and rapid. They breathe out a lot of water that can condense on the inner walls of the coop, as well as on the chickens, if there isn’t enough ventilation in the coop. A damp bird has a hard time keeping warm and is liable to become ill.
My husband dug out and cleaned the storm window I salvaged to use in the coop. (Another window of the same size covers my cold frame.) He built up a frame for this window, which is basically a piece of glass with an aluminum edging, inside the main window of the coop so that there would be a three-inch air space between the two panes of glass. He used some butterfly clips to secure it and make it easier to install and remove. This window is warmer and brighter than the Styrofoam board that I had been using to insulate this window. My husband built the overhang on the coop to admit the lower angled rays of the fall and winter sun. The double-paned window has the added advantage of letting in sunlight and making use of solar gain on bright days.
I’ve already hung the 250-watt ceramic heating bulb screwed into a heating lamp hood in the coop above their perches. (I found it on a website that sold supplies for people who keep reptiles as pets.) I won’t plug this in until the weather gets into the teens. (I have to admit that I’ve used it when the temperature was in the low 20s (F) and a hen decided to molt at the wrong time of year—they are pets after all!)
When the temperatures get in the single digits and near or below 0 (F), I will set up the oil radiator on top of a couple of the thicker patio brick. (Putting any heater above the bedding lessens the chance of fire. Don’t use a heater with an exposed flame or electric bar—you risk losing your coop and all your stock.) It will heat the coop when the temperature really drops. People with bigger flocks don’t need heaters; the birds themselves heat the coop. I only have four gals. My girls will only raise the coop temperature 4 or 5 degrees and that mainly because my coop is so well insulated with R11 bats in the walls!
I start to get into the habit of checking the thermometer that I have in the coldest corner of the coop, and I make sure that my LED touch light on the wall just inside the door is in good working condition. The thermometer tells me whether my heaters are working or if they need to be adjusted. The LED light helps me read the thermometer during the dark of winter!
Another thing that I do to prepare for colder weather is bed the yard more heavily. I clear out the broken down and exhausted straw and use it to create new garden beds or add it to old beds as a feeding mulch. Any raw manure in the straw will be broken down even further by the harsh winter conditions. I pay special attention to the northwest corner of the yard that bears the brunt of the prevailing winds. I create wind breaks with slices of straw laid against the fence (see my November 6 blog: Chicken Nests and Windbreaks). The girls will almost always choose the outside to the inside, so providing a sheltered situation for them is important.
My last preparation for snow and frigid weather is to locate my big tarp for the chicken yard. I will tarp the yard at night or when a big snow storm is coming during the day. When the snow stops, we shovel off the tarp enough to drag it and the remaining snow out of the yard. This keeps the space relatively snow and ice free and allows the girls to be out most of the winter. I like to avoid cooping up the birds as much as possible. This prevents most pecking problems that come with boredom and crowding.
A lot of the things that I do to keep my birds healthy and comfortable are things that a person in a more rural situation probably wouldn’t bother with. In town, chickens tend to be viewed as pets, working pets but pets all the same. My neighbors enquire after the wellbeing of my girls when the weather is harsh. They ask if they are warm enough! We urban chicken ranchers also tend to have fewer of birds, which creates problems that people with bigger flocks don’t experience as acutely. Keeping your birds from freezing to death during a northern cold snap of -10 or -15F weather is more of challenge with a small flock! (Although last year during an early winter cold snap, some country folks with much larger flocks lost numbers of birds to the cold.)
Winter can be a tough time for the feathered ones and for the people who care for them. With a little foresight and preparation, a lot of its hardships can be avoided. Stay warm! Begonia
Images:
0 Comments | Post Feedback |
|
Chicken Nests and Windbreaks
Saturday, November 06, 2010
We are truly headed into winter. Last week we had cold, gusty weather. The wind came out of the northwest and chilled right to the bone. Some of the gusts topped out at 60 miles per hour. The chicks went out as usual, only retreating to the coop when it began to blow and rain.
When it stopped raining, I broke a bale of straw and lined the northwest corner of the yard with “slices” or flakes of hay. These were normal-size kicker bales, so each slice was about chicken height. I then laid a few flakes of hay in the middle of the “V” so the girls could scratch them up and create their own fluffy bed of hay to snuggle down into protected from the wind.
Being chickens, they just couldn’t resist all the possibilities in those flakes of hay lining the fence, so eventually they tore them up and stomped them down as well. I went out a couple of times that day when the wind was at its worst to kick the hay back up against the fence and bank the corners. (Another option might be to wire a few sheets of plywood into place, but we don’t have any to spare at the moment.)
Most days find the girls gathered in the corner nestled deep in the straw, their dark plumage soaking up what sun is shining. They are tough gals and enjoy being outside, especially when there is some protection from the wind. Begonia
Images:
0 Comments | Post Feedback |
|
|


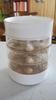
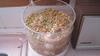
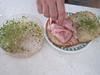
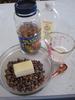
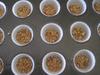
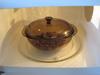


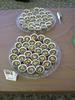


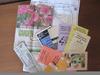
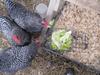
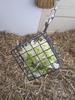
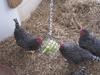


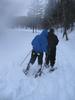
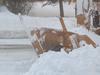


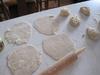


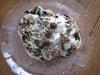
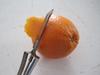
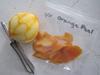


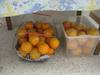
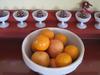

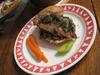
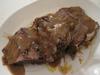

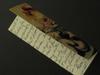


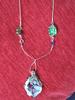


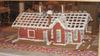
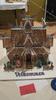
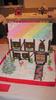


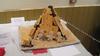


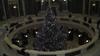


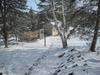

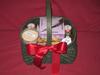


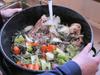

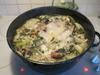


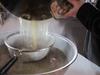
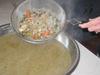
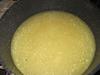

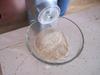


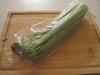


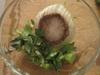
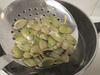

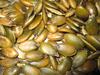
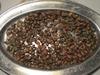


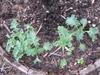
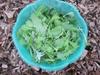


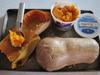

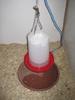


