Homemade bread/buns
Friday, March 04, 2011 | By leftthesanebehind
I have started making my own homemade bread/buns on a weekly basis now. I am by trade a baker so the skills are natural to me!. It costs so little to store a bag of flour and yeast to provide my family with chemical, preservative, additive free breads. I enjoy the time it takes to make it, love to watch it rise and rise again and the smell in the house can't be found in a store! HUGS to all
0 Comments | Post Feedback
Sprouting: Cheaper than Lettuce!
Wednesday, March 02, 2011 | By begonia
I about had a stroke last night in the produce section of our local grocery store—right in front of the iceberg lettuce! The heads were small and misshapen and almost $3 each. The romaine lettuce was almost $8 for three heads in a plastic zip top bag. I turned to my daughter and said, “NO WAY!”
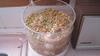
This is the time of the year when we really get serious about sprouting. We use sprouts to replace some of the lettuce in salad and as a substitute for it on sandwiches and in roll ups.
Sprouting has many advantages:
· Sprouting seed costs very little per ounce for the amount of food that it turns into within a few days of germination. (You can be eating sprouts in as little as 3-7 days.)
· It is one of your best fresh/live food values. (I bought raw organic hulless sunflower seed yesterday for 74 cents a pound, and it only takes two tablespoons per sprouting tray.)
· Sprouts are full of vitamins and minerals.
· Food just doesn’t come any fresher or more local.
· The seed stores well and doesn’t take up much space. All you need is a clean container and a dark, dry, cool pantry or kitchen cabinet to store them.
My mom started sprouting alfalfa seeds in the 1970s. She used Mason jars with screen lids and used the resulting sprouts in salads. She also experimented with other mixtures of seed. She would soak the seeds in warm water in the jar for a while and then drain away the water through the mesh lid. Every day afterward, she would rinse the seeds in the morning and evening. After they germinated, the rinsing would carry away the hulls. Eventually, she would have a jar full of tangled sprouts. She kept the sprouting jars on their sides under the kitchen sink during this process.
There are many more complex contraptions today for sprouting, and they can be quite expensive. The jar and screen lid method is still one of the cheapest around. I’ve tried various styles of sprouting and have settled on a couple that are quick, easy, and meet my family’s needs.
I use a stacked siphon sprouter (Bioset Kitchen Salad Garden) most of the time. This sprouter works well for small as well as large seeds. It has a top tray with a siphon that drops water down into the next tray and so on through three trays and finally into a bottom reservoir. When all the water has drained to this bottom tray, I empty it and that is it. I make it part of my morning and evening routine and always keep the sprouter out on my kitchen counter next to the radio. (If you pack the sprouter away, you probably won’t get it out and use it.)
I also have a simple tray-style sprouter in which the rinse water drops straight through that works better for sunflower seeds and larger seeds. I find I have to rinse more often with this sprouter so the sprouts don’t dry out.
Johnny’s Seed ( www.johnnyseeds.com ) sells the Bioset sprouter and a selection of sprouting seeds. Many other seed companies sell sprouting seeds and sprouters, including Jung ( www.jungseed.com ), Thompson & Morgan ( www.tmseeds.com ), and R.H. Shumway ( www.rhshumway.com ) to name only a few. Thompson & Morgan and Johnny’s have the widest selection of sprouting seed, but R.H. Shumway has some of the lowest prices. I have also bought sprouting seed at bulk and natural food stores. The advantage of these stores is that you don’t have to pay postage!
Give sprouting a try. At the price of lettuce and other fresh vegetables right now, you could buy a sprouter and some seed for the price of one trip the grocery store produce section! Begonia
2 Comments | Post Feedback
eat healthy for less!
Saturday, February 26, 2011 | By MzScarlett
Tons of recipes are available on line for make it yourself mixes; everything from cake mixes; to cookie mixes; to bean soup recipes; pudding mixes; and wow! can u really save a bundle by doing this!
Buy seasonings by the Tablespoon or whatever small amount to be used quickly from bulk rather than in containers;
There is so much chemically treated salt being used in processed foods now, you are far ahead to make your own everything folks; you can get healthy organic salt cheaply; search out places like my health food store had 1 lb of grey celtic salt for less than $5.00;
I also get himalayan sea salt inexpensively from a store 20 miles away; grind my own; also get organic peppers and grind my own; never liked pepper much til I started grinding my own peppercorns!
I was unaware of various types of rice til I started searching them out for healthier foods to try; now I love jasmine, and various others I can get thru searching various stores, on line, etc; for less expensively sadly than I can locate locally; did get a 25 lb bag of basmatic rice organic at the store 20 miles away; love eating it with salsa on top; and with using spagetti sauces, make it yourself chicken stock; beef stock etc;
With you making your own, YOU have the control over what is going into the mixes; do check out www.vitacost.com; which only charges $4.99 s&h irregardless of how much you order!
Recently discovered a type of bean that is so outstandingly superb in taste irregardless of how it is cooked that I am going to buy 25 lbs of it; keeps best refrigeratored or frozen; so I plan on filling my freezer with them! these are called anasazi beans; I order from www.bobsredmill.com; or from www.amazon.com; with subscribe and save; but they have yet to offer the 25 lbs from him that I like;
His products are always and ever superb; hard to locate many of them in my area; and I love his whole wheat farina which is available only from his site!
Do google "dehydrated foods"; go to library and get information; is simple and easy to do; then you have your own herbs; and it's very rewarding to have your own dried veggies grown yourself handy to have to eat! very simple to do; including mints for teas!
I have recently started using Bob's red mill milk powder; which is not instant milk at all; and learned that putting the water 1st the blender; then mixing for quite a bit; and putting into a ceramic pitcher is outstandingly good for a creamer for coffee and far healthier for me; and have even enjoyed being able to enjoy the taste of milk again!
Recently got a book on cheese making; and you can google this as well; very rewarding and easy and simple to do! and far healthier for you as well!
Using healthier sugar is incredibly rewarding as well; I have tried several various kinds; and the change in taste is incredible!
I actually have 2 food dehydrators that I have used this past summer; and would love to find a way to do it in the sun on screens; someone told me that a friend of hers had done this with grapes she made into raisons and they were absolutely the best she had ever tasted in her life! Hope to find some "free" this summer to try this with!
Eating healthier doesn't have to be expensive; lots of research is available out there and just like finding what stores carry the best prices on what is what needs to be done; working with others can be fun and rewarding as well! sharing ideas is like suddenly realizing wow! if I had only had a brain I would have thought of this a long time ago!
Taking a thermos of coffee with you; a REAL cup instead of a paper one; and having your own home made banana bread with you makes you feel like a queen; far healthier; far cheaper; and satisfying to boot!
Here's to your health!
0 Comments | Post Feedback
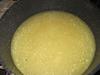
Quick strawberry Jam
Saturday, January 29, 2011 | By leftthesanebehind
Found this recipe in an old recipe book i had, Strawberries were on sale for $2 a container. it calls for strawberry gelatin, which was .69 cent's 3 cups of sugar and that is it!..all in all it cost me less then $2 per jar for 5 jars of jam!..It hasn't set yet but will let you know and share the recipe if it sets right and it good enough to be shared Hugs to all chrystal
5 Comments | Post Feedback
Odd and Ends: Orange Peels
Wednesday, January 26, 2011 | By begonia
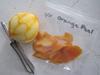
I love the smell when I am peeling an orange. Most of the time I cut them into slices for easier eating, and the peel goes into the compost pail when the meal is over. Sometimes when we need a quick snack on the go, we just take the whole orange and peel it in the car or when we get to our destination, and the peel goes in the trash if I don’t pack it home and throw it on the compost pile on the way into the house.
Years ago when oranges were precious treats eaten only at Christmas time, many mothers would confiscate the peels and use them in baking or to make into that delicacy, candied orange peel. http://candy.about.com/od/fruitcandy/r/candied_peel.htm
I think that fresh or frozen orange peel gives the best flavor to baked goods, so I try to have a small supply of it in the freezer at all times! Whenever I buy oranges I use my potato peeler to scrape the orange layer of the peel from one or two fruits after I have washed them with a dab of Dawn liquid dishwashing soap. Be sure to rinse all of the detergent off after you are done sudsing the fruit! (If you are worried about pesticide residue, buy organic fruit, but still be sure to wash the fruit well before peeling.) This method can also be used to save lemon and lime peel.
I place the citrus peels in a small tightly sealed plastic bag or container and store in the freezer. I have also stored them in the freezer wrapped tightly in foil. They freeze well, but beware of freezer burn. If the peels get too frosty, start over with a new batch.
Next time you eat an orange, don’t throw out all the peel—freeze some to use later! Begonia
0 Comments | Post Feedback
Fantastic Teas for Great Price!
Saturday, January 15, 2011 | By MzScarlett
Amazon has some great buys organically etc that are difficult to locate locally; since I enjoy drinking teas a lot especially in the winter months; but also enjoy ice teas; I found that Davidson's on amazon are organic and just got a lb of it! for $12 or less! I subscribed to the subscribe and save; no shipping & handling fees this way; and got a whole lb of chamomile tea (loose) which is the very best I have ever had in my life! Normally I don't care for the "tea bags" so mix mint with it to make it better;
This was the whole heads of dried chamomile heads; crush them together and it releases more of the "flavor"; I made a pot of it in my coffee pot and it was wonderful beyond words with a little honey in it!
I have also gotten whole hibiscus heads this way; oh, and it is delicious as well; and the Earl Grey I enjoyed greatly as well; in fact, I mixed a little of the English tea in with it because it was kind of "bland" by itself!
From the remarks on hibiscus it makes fantastic iced tea; so I am going to try that when it gets a little warmer! been so cold here don't even like the idea of anything iced! Oh, I am looking so forward to spring and summer!
0 Comments | Post Feedback
Seal-A-Meal
Wednesday, December 29, 2010 | By amseibel
After years of wanting one, I finally got a Seal-A-Meal for Christmas. It was a bargain - my husband found it on clearance at Walmart for around $50. But when he got to the checkout, it rang up for $39...
Last night I got to test it out.
The only "gotcha" with the process is the cost of the bags. I got two 20 foot rolls of bags at Walmart for $20 - kind of pricey for me, but I figure I can save enough on food to more than pay the difference. But I'll be watching the thrift stores and outlets for cheap bags in the future.
On Monday, we stopped at Sam's to pick up a couple of items I needed and found that they had their fresh (never frozen) turkey's on sale for 58¢ a pound. We picked up one that cost around $11. I immediately took it home, seasoned it up and popped it into my electric roaster (another after Christmas bargain purchase ($15) from a few years ago that I absolutely love). After it was done, I drained the excess liquid and took it, still in the roaster liner, out to the garage to cool overnight. (When it is freezing outside, my garage stays at around 35 degrees so I use it a lot in the winter to keep food cold for short periods.) Then last night, we dismembered the turkey and SAM'ed it. Since it is just the two of us, we put about 10 oz of meat (1/2 white, 1/2 dark) in each bag. I think we have about 15 bags.
While I was at WM buying the bags, I stopped at the supermarket across the street where hamburger meat was on sale for $1.69 lb. Got three large packages and divided it into 8oz. portions and froze that too.
We'll be eating turkey & hamburger for quite a while...
0 Comments | Post Feedback
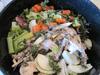
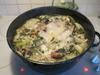
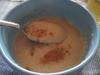
Odds and Ends: Don't Throw Away That Carcass!
Friday, November 26, 2010 | By begonia
I probably should have posted this before Thanksgiving, when many people were cooking a whole bird and throwing away one of the best parts! Oh well, you can always redeem yourself with the Christmas turkey.
When preparing your bird for roasting, be sure to save and freeze the neck if you aren’t going to use it right away for broth to make gravy. Set aside the carcass of the turkey, including bones from the drumsticks, wings, and thighs after carving. (Don’t save any bones from parts of the turkey that people have put in their mouths. Cooking with bones that people have slurped all over is both gross and disturbing—even though you will be boiling the bejeebers out of them. That’s my opinion, but it is your call!) I throw away the fat, tail, and skin because I like a leaner broth. (You can put the carcass in a large plastic bag and freeze until you are ready to make broth if you don’t have time to make it the same day.)
Put the carcass and neck into a big pot when you are ready to make broth. Cut into large pieces and add:
-
3 large onions
-
5 or 6 stems of celery
-
2 large carrots
-
6 or more whole peppercorns
-
A generous handful each of parsley and sage
Cover the contents of the pot with one to two inches of water and bring to a boil. Simmer until the carcass falls apart. Add water as needed to cover carcass as it cooks.
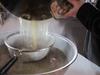
Remove most of bones and vegetables with a slotted spoon and pour the broth and what solids remain through a strainer or cheese cloth. I use a wire strainer, but if you want a clear broth, line the strainer with cheese cloth. Throw away the bones and spent vegetables and herbs—all of their goodness is now in the broth and they are pretty much mush.
My broth usually doesn’t have enough fat in it to worry about because I discard the skin, tail, and visible fat while carving the turkey, but sometimes it is necessary to remove fat. You have several options:
-
Chill the broth and scrape the fat off once it rises to the top and solidifies.
-
Skim with a spoon and then drop paper towels onto the surface of the broth to absorb the last of the fat.
-
For small amounts of broth, use a fat separator pitcher to drain broth from underneath the fat that has risen to the surface.
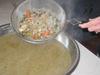
You now have broth to make soup, gravy, or sauce or with which to cook rice, vegetables, or potatoes. You will note that I didn’t add salt when creating the broth because I use it for so many different purposes. (I add differing amounts of salt depending on the dish.)
You can use the broth right away, refrigerate it for a couple of days, or freeze it for months until you need it. I usually freeze my broth in 2-cup and 2-quart batches because these are the most common quantities needed for my favorite recipes.
You can use this method of making broth with chicken and beef, too. There is nothing nicer than the smell and taste of a good bowl of homemade broth in the winter. Begonia
0 Comments | Post Feedback
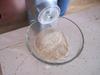
Grinding Your Own Breakfast Cereal
Wednesday, November 24, 2010 | By begonia
I picked up a Back to Basics manual grain mill at a garage sale a few years ago that someone had bought as preparation for the year 2000. It was new in the box and cost me $5. I took it home, put it on a shelf in my pantry, and forgot about it.
I remembered the little grain mill while in my favorite bulk food store. I picked up a bag of wheat berries and thought, “I’ve got a grain mill I’ve never tried out!” I bought a bag of wheat, took it home, put it on a shelf in my pantry, and forgot about it!
I was sitting in my recliner with my breakfast coffee and a boring bowl of cold cereal and thought “Wouldn’t a bowl of hot cereal other than oatmeal or Coco Wheats be a nice change? “
And then I remembered! I got the grain mill out, retrieved the bag of wheat from the pantry, and started experimenting.
I found that I could get several grinds from the very simple mill depending on how tightly I screwed down the handle. I can make cracked wheat for bread, a finer grind for farina breakfast cereal, or a border-line coarse flour for whole wheat bread (it took a while to grind enough flour for bread with the little mill).
I’m usually not a fan of plain farina or “Cream of Wheat” hot cereal, but I found that the fresh wheat made a superior product to what I have bought from the grocery store. I added cinnamon to one batch and it smelled and tasted wonderful.
I prepared the cereal by bringing ¾ cup (6 oz.) water with a pinch of salt to a boil and sprinkling three tablespoons of farina into the boiling water while stirring constantly. Then I turned the heat down and continued to stir and cook for one or two minutes until the mixture thickened. I then took the pot off the heat, covered it, and let it sit for a few minutes covered and allowed it to thicken some more. Finally, I transferred the cooked cereal to a warm bowl with brown sugar, a little butter, and milk or half and half.
When properly stored in a cool, dry place, wheat keeps well for a year or more. When it is ground, it has a short shelf life before it begins to go stale (the wheat flour from the store has a stronger taste for this reason) because of the oil in the wheat germ. I freeze what flour or farina I have left over from each grinding for this reason.
If you get really serious about grinding all your own flour, you will probably want to buy a bigger hand or electric mill. For now, I’m just dabbling and will stick with my little one! Begonia
0 Comments | Post Feedback
making it yourself!
Wednesday, November 24, 2010 | By MzScarlett
Since I order from www.amazon.com food items mainly that are not available in my area or I can get there cheaper than I can find here; especially with the $25 or more purchase and free shipping! (certain items) which is what I get!
Have been watching JR Specialties which offers 7 vanilla beans for $7.95 with free S&H; far cheaper than I can get locally; reading all the reviews discovered many recipes for making it yourself vanilla extract! Incredibly simple and inexpensive and the reports said repeatedly that it was far superior than the boughten ones. So I took the plunge and am looking forward with joy to getting them anyday now!
www.hillbillyhousewife.com offers a lot of great recipe ideas including one to make your own sweetened condensed milk! Going to take another plunge and make this as well.
As soon as my mayonnaise is gone, I am going to make my own as well! on www.ehow.com I was reading many ways to make your own; they all say the same thing: incredible taste! and you will never go back to store bought again!
I NOW know to buy "spices" a Tablespoon or so from "bulk" rather than the prepackage stuff that is over priced, fills land up and sits til outdated in a shelf anyway! Also, may times the Mexican or Asian markets or places in groceries stores for these offer small amounts of spices far cheaper than those in the "regular" aisles that we have grown up buying from!
Love seeing reviews, and learning of new beans, rices, recipes that I had never encountered before in my life! that are healthier, and exciting to try out!
Change is indeed good! After reading reports over "rice" and basmatic and jasmine; I tried both and could not believe on what I had been missing out on! wonderful items! Now I do have to go about 15 miles to a nearby town to get them at the store there that offers many organic items: but it is well worth the trip to me! Last time I was there, I bought a 25 lb bag of brown basmatic organic rice; and put into glass jars; so much fun to use soups, or spagetti sauce, or just top with salsa which I love! Absolutely adore the rice cooker I got at a thrift store for $4! However, I have discovered to check it when cooking the rice as many times I need to add more water to it; especially when using soups and spagetti sauce!
Jasmine rice though is a favorite as well; so incredibly delightful one wonders why the other "rice" is offered at all! (generic!)
Today I am going to make chili beans; I have all the ingredients; and it just sounds really good as it is super cold here; and I hate canned chili! This way I can make a bunch; and then freeze so many nights ahead I only have to make cornbread and can have a delightfully delicious meal or lunch at little cost, and great to my health!
looking to see what other items I can easily make my own at far less expense!
0 Comments | Post Feedback
|